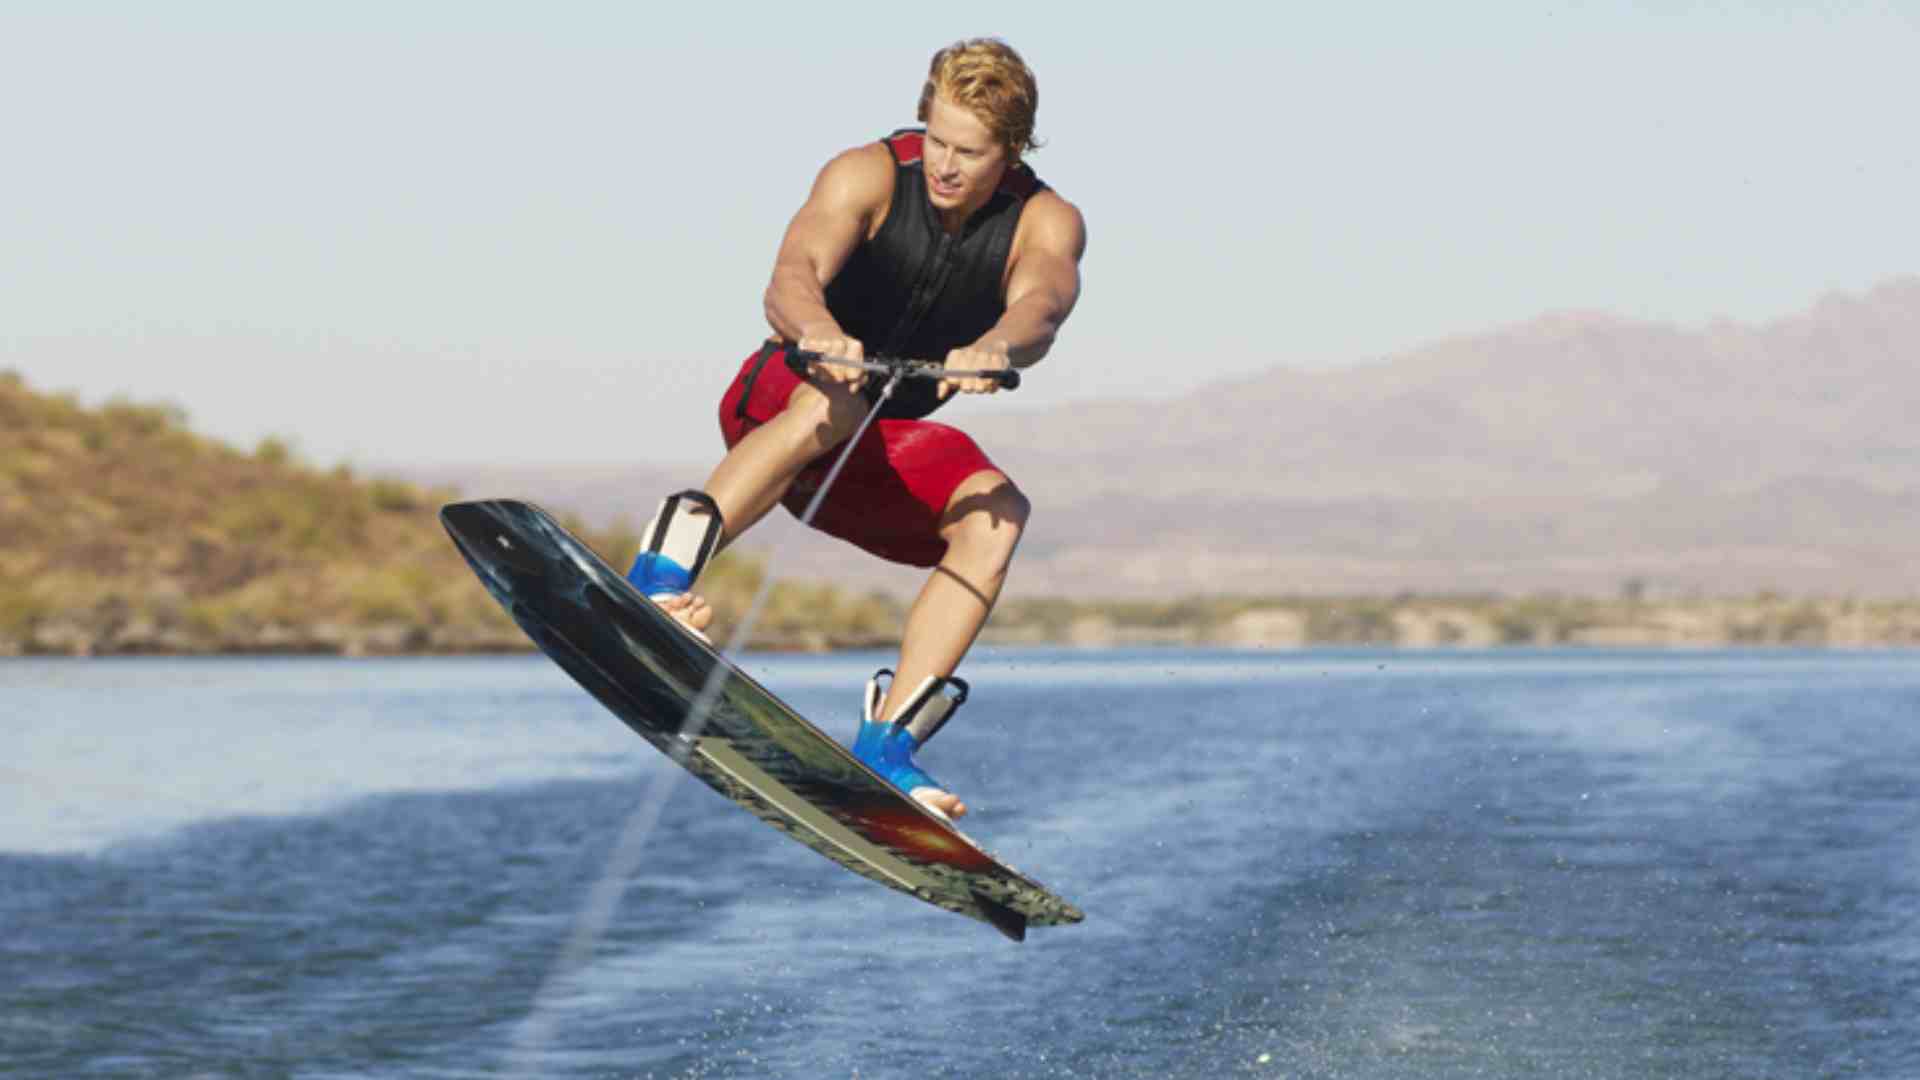
Wakeboarding Trick: Backside Lipslide
Wakeboarding is a thrilling watersport that combines the agility of snowboarding with the exhilaration of surfing. Among the many tricks that wakeboarders strive to perfect, the Backside Lipslide stands out as a stylish and challenging maneuver. This trick is a perfect blend of balance, board control, and timing. If you’re aiming to level up your wakeboarding game, learning the Backside Lipslide will put your skills on display while boosting your confidence on the water.
In this in-depth guide, we’ll break down everything you need to know about performing the Backside Lipslide, from technique and training to the gear you’ll need, including boards, bindings, and accessories. We’ll also look at price ranges for the equipment so you can get started without breaking the bank.
What Is a Backside Lipslide?
A Backside Lipslide is a trick where the rider slides the tail of the wakeboard across a feature, such as a rail or wake, with the rider’s back facing the boat. Unlike a frontside lipslide, where you face the wake, the backside variation requires you to rotate the board and slide with your back to the direction of travel.
Here’s the basic breakdown:
- Approach: Approach the wake or obstacle with the correct speed and positioning.
- Rotation: Pop off the wake or onto the rail and turn the board 90 degrees so the tail lands on the obstacle while the rider’s body turns backside.
- Balance: Keep your weight centered over the board, focusing on keeping your body low to maintain balance.
- Exit: Finish the slide and rotate back to your normal riding position, landing softly and continuing your ride.
While it sounds simple, the Backside Lipslide requires technical precision, good board control, and a solid sense of timing.
How to Perform a Backside Lipslide: Step-by-Step Guide
1. Approaching the Wake or Rail
Your approach will set the tone for the entire trick. You want to come at the wake or rail with a solid edge and a decent amount of speed. Make sure you’re on your toeside edge if you’re aiming for a wake or the feature. Maintain a comfortable stance with your knees slightly bent and your back straight. Your goal is to prepare for a clean pop or lift as you approach the obstacle.
2. Popping Off the Wake or Rail
As you reach the lip of the wake (or before hopping onto a rail), pop the board by pushing down on the water with your back foot. As you leave the water or move onto the rail, rotate your body 90 degrees so the back of your board (tail) slides across the wake or obstacle. Your upper body should be facing away from the boat or cable, hence the “backside” designation.
3. Maintaining Balance and Position
Now comes the tricky part: keeping your balance. While sliding, you need to lean slightly backward (toward the tail of your board), but not too much, or you’ll lose control. Keep your knees bent and your weight low. Use your core muscles to stabilize yourself and stay balanced during the slide. Stay focused on where your board is moving to ensure a smooth ride across the feature.
4. Exiting the Slide
Once you’re done sliding, gently rotate the board back to its original position by using your hips and shoulders to guide the turn. Keep your eyes forward to land smoothly on the water after exiting the slide. Make sure to stay centered over your board and maintain your stance to keep riding.
Common Mistakes and How to Avoid Them
- Not Maintaining Enough Speed: Without enough speed, the board may catch or stick to the obstacle, causing a fall. Approach with enough momentum to clear the slide smoothly.
- Over-Rotating the Board: Rotating too far can throw off your balance. Keep your body movements controlled and measured to prevent over-rotation.
- Leaning Too Far Back: Leaning too far back or forward can make you slip off the rail or lose control. Keep a balanced stance, with your weight centered on the board.
- Not Preparing for the Landing: Some riders focus too much on the slide and forget to set up for the landing. Keep your head up and look ahead to ensure a smooth finish.
Gear for Mastering the Backside Lipslide
Having the right wakeboarding gear can make or break your experience. For a successful Backside Lipslide, you’ll need a durable wakeboard that can handle the stress of hitting rails and wakes, along with reliable bindings to keep your feet securely attached to the board.
Wakeboards
For wakeboarders looking to master rail tricks like the Backside Lipslide, it’s crucial to choose a board that is both durable and flexible. Here are a few top choices:
1. Ronix Kinetik Project Flexbox 2 Wakeboard
- Price: $549.99
- Specs: Designed for rail riding, the Kinetik Project offers Flexbox 2 technology, giving the rider extra flexibility on the rails and maximum control during tricks like the Backside Lipslide. Its sintered base provides durability, while the unique concave shape makes it ideal for both smooth rides and advanced slides.
2. Liquid Force Butterstick Pro Wakeboard
- Price: $469.99
- Specs: Known for its flexibility and durability, this board features a full wood profiled core and a softer flex tip and tail, making it ideal for sliding across rails. Its sintered Grind Base ensures a smooth ride, while the 3-stage rocker helps riders pop high off wakes.
3. Hyperlite Union Wakeboard
- Price: $439.99
- Specs: The Union is a strong choice for rail riders, with a fully machined wood core and a durable flat base. It provides a consistent slide and smooth landings, with a feature-friendly design that’s perfect for tricks like the Backside Lipslide.
Bindings
Equally important to a good board are high-quality bindings. Bindings that offer support, flexibility, and a snug fit can improve your control while performing tricks.
1. Ronix One Carbitex Wakeboard Bindings
- Price: $599.99
- Specs: These bindings are stiff, responsive, and designed for advanced riders looking for high performance. They feature a Carbitex Flex panel and molded 3D tongues for ultimate foot security and control during hard tricks.
2. Liquid Force Tao 6X Wakeboard Bindings
- Price: $469.99
- Specs: With a focus on comfort and support, these bindings offer a snug, responsive fit with a Honeycomb Flex floor. Their 6X chassis ensures lightweight performance with solid stability.
Final Thoughts
The Backside Lipslide is a high-impact trick that requires a solid understanding of wakeboarding basics, excellent balance, and top-notch gear. By following the steps outlined here and investing in durable, high-quality equipment, you’ll be on your way to nailing this impressive trick.
Pricing Summary for Wakeboarding Gear:
- Wakeboards: $439.99 – $549.99
- Bindings: $469.99 – $599.99
Whether you’re practicing behind a boat or at a cable park, stay persistent, focus on your form, and keep pushing your limits. Mastering the Backside Lipslide may take time, but the reward is a new level of wakeboarding confidence and skill!
Happy Boating!
Share Wakeboarding Trick: Backside Lipslide with your friends and leave a comment below with your thoughts.
Read Ways to Celebrate July 4th on a Boat – Guide until we meet in the next article.