KeelGuard vs. KeelShield
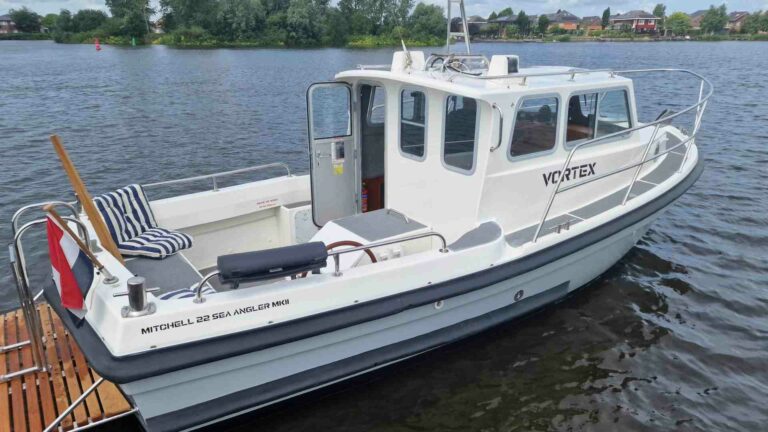
For boat owners, protecting the keel—the backbone of the hull—is critical to maintaining a vessel’s performance, longevity, and resale value. Routine beachings on sandy or shell-covered shores, loading onto trailers, or navigating shallow waters can cause significant wear and tear on a boat’s keel. Products like Megaware KeelGuard and Gator Guards KeelShield offer robust solutions to shield the keel from abrasions, impacts, and scratches. But which is the better choice for your 18 ft. center console? Are there superior alternatives? Does coverage length matter? Can these products improve top-end speed, and is installation a DIY job or best left to professionals? This comprehensive guide answers these questions, diving deep into the features, performance, installation, and alternatives to help you make an informed decision.
Why Keel Protection Matters
The keel, running along the bottom of the hull, is one of the most vulnerable parts of a boat. It bears the brunt of impacts from sand, shells, rocks, and concrete ramps during beaching or trailering. For fiberglass boats, repeated abrasion can erode the gel coat, exposing the laminate to water damage. Aluminum boats risk dents, scratches, or punctures. A keel protector acts as a sacrificial barrier, absorbing damage to preserve the hull’s integrity. Beyond protection, a keel guard enhances a boat’s appearance and boosts resale value by keeping the hull pristine.
Benefits of Keel Protection
- Prevents Costly Repairs: Shields the keel from scratches, gouges, and structural damage.
- Enhances Resale Value: A well-maintained hull appeals to buyers.
- Improves Aesthetics: Offers a sleek, customized look with color options.
- Ensures Performance: Maintains hull efficiency by preventing damage that could affect hydrodynamics.
KeelGuard vs. KeelShield: A Detailed Comparison
Megaware KeelGuard and Gator Guards KeelShield are the leading DIY keel protection products, trusted by recreational boaters and manufacturers like Triton, Ranger, and Nitro. Both use durable materials and 3M adhesives, but differences in design, adhesive strength, installation, and performance set them apart. Below is an in-depth comparison based on user experiences, lab tests, and manufacturer claims.
1. Material and Durability
Both products are engineered to withstand harsh marine environments, but their material compositions differ slightly:
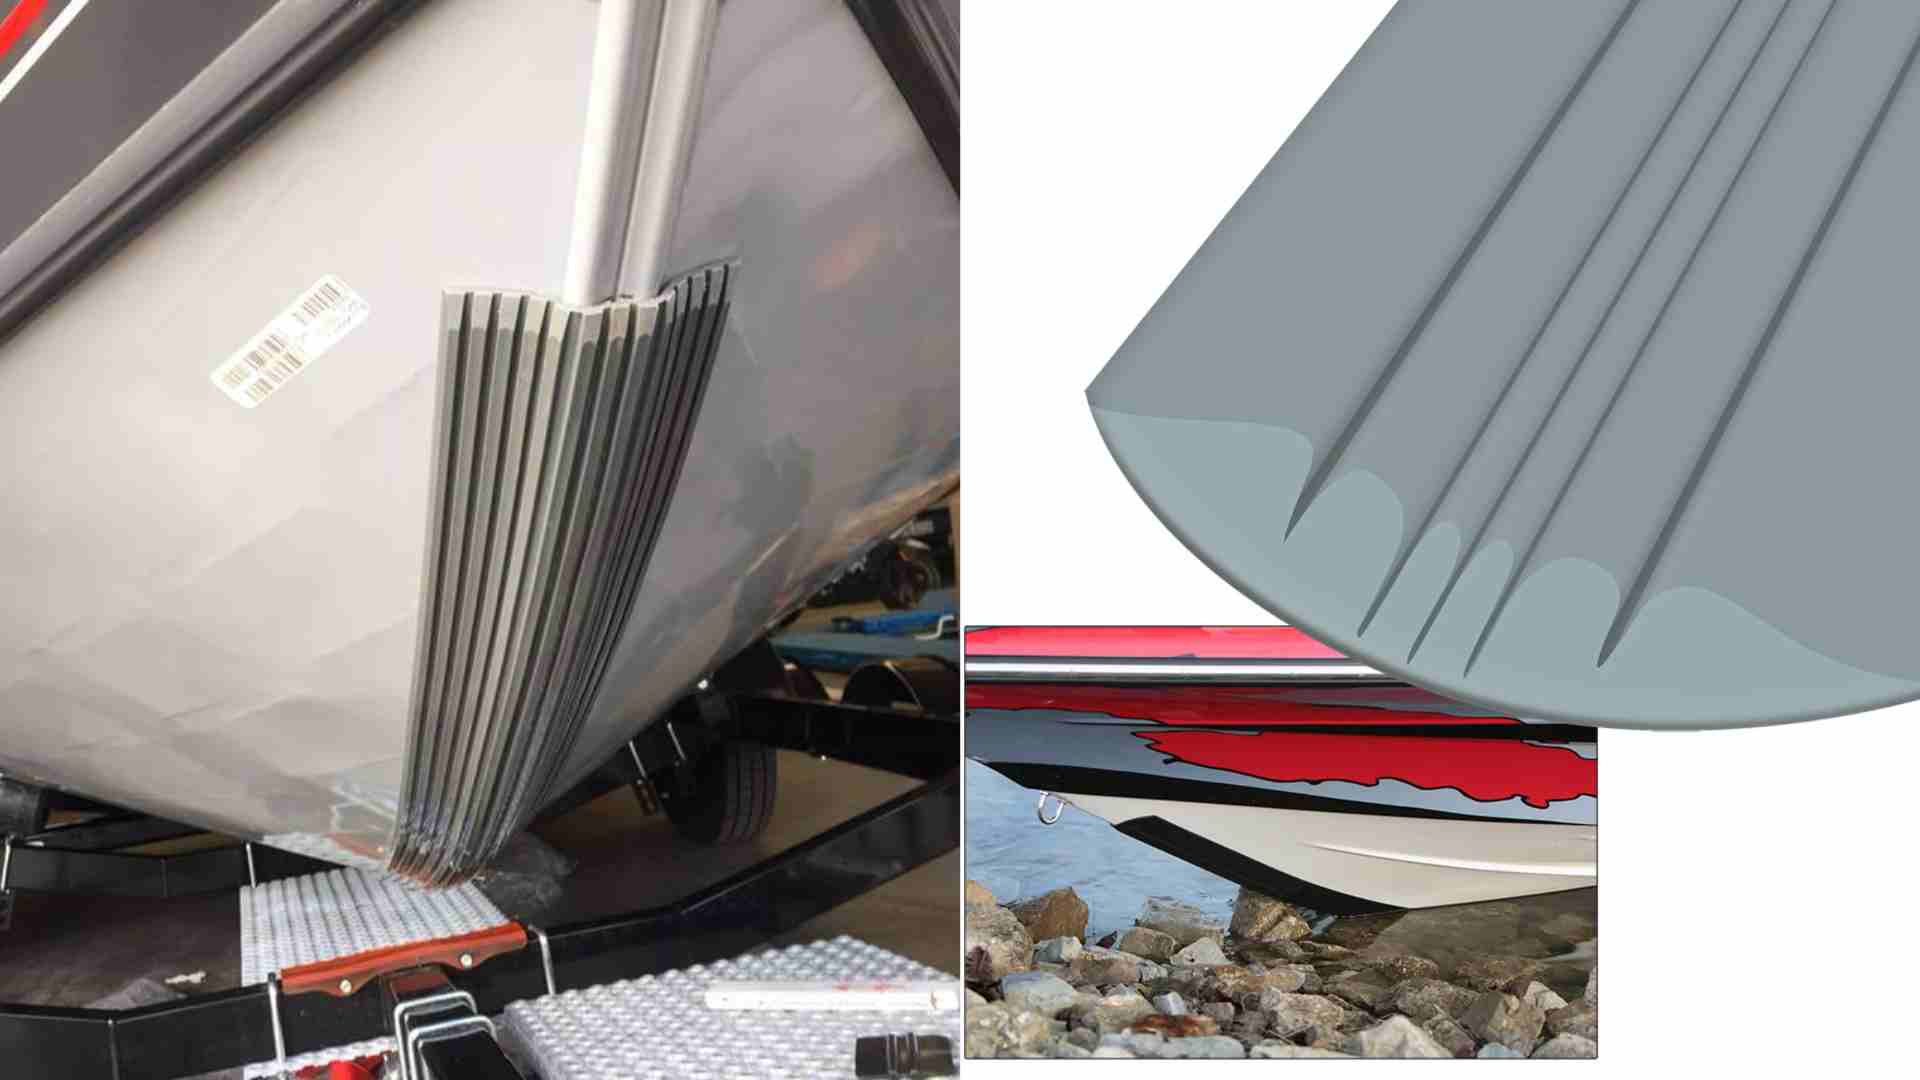
- Megaware KeelGuard:
- Material: High-quality polymer compound with UV stabilization to resist fading and cracking.
- Design: Features angled grooves that create hydrodynamic channels, potentially reducing drag by forming air pockets.
- Durability: Highly abrasion-resistant, with users reporting minimal wear after years of beaching on sand and concrete ramps. Some note it may dull or scratch over time.
- Warranty: Lifetime warranty against abrasion and adhesion issues for the original purchaser.
- Gator Guards KeelShield:
- Material: Urethane polymer composite (sourced from Dow Polymers), touted as stronger than plastic or PVC-based alternatives.
- Design: Smooth, glossy finish that resists scratches and maintains shine. Lab tests by Structural Composites, Inc. claim KeelShield loses four times less mass than KeelGuard in abrasion tests.
- Durability: Exceptional longevity, with users reporting KeelShields lasting over 18 years without peeling or wearing through. It’s the factory standard for brands like Triton and Nitro.
- Warranty: 100% lifetime warranty covering abrasion and adhesion, with strong customer service for replacements.
Verdict: KeelShield may have a slight edge in durability due to its urethane polymer and superior abrasion resistance in lab tests. However, KeelGuard’s UV-stabilized polymer performs admirably in real-world conditions, with minimal wear reported.
2. Adhesive Strength
Adhesive quality is critical to ensure the protector stays in place under constant water exposure and impacts.
- KeelGuard: Uses 3M VHB (Very High Bond) pressure-sensitive adhesive. While reliable, some users report peeling if improperly installed or exposed to extreme conditions (e.g., concrete ramps or trailer rollers). Applying 3M 5200 marine sealant around the edges can enhance adhesion.
- KeelShield: Employs a thicker 3M marine adhesive, claimed to require nearly four times the force to peel compared to KeelGuard in lab tests. Users consistently praise its adhesion, with rare peeling when installed correctly.
Verdict: KeelShield’s adhesive appears stronger, reducing the risk of delamination. Proper surface preparation (sanding, cleaning with isopropyl alcohol, and priming) is crucial for both products.
3. Installation Process
Both KeelGuard and KeelShield are designed for DIY installation, but the process requires precision to avoid air bubbles or misalignment.
Installation Steps (Common to Both):
- Surface Preparation:
- Mask off the installation area (6-9 inches above the waterline to 3 inches beyond the keel’s lowest point).
- Lightly sand the keel with a Scotch Brite pad.
- Clean with isopropyl alcohol (avoid acetone, which leaves a film).
- Apply the provided primer or activator and let dry for 5 minutes.
- Application:
- Center the protector on the keel, starting at the bow.
- Apply in 8-10 inch sections, pressing firmly with the provided applicator (KeelGuard uses a spatula, KeelShield a roller).
- Roll or squeegee to remove air bubbles.
- Finishing:
- Optionally apply marine-grade silicone around edges for extra security.
- No curing time is required; the boat is ready for immediate use.
Key Differences:
- KeelGuard: The spatula applicator is user-friendly, but precise alignment and trimming are critical for a custom fit. Some users find it easier to work with on curved keels.
- KeelShield: The roller applicator can feel flimsy, requiring careful pressure to avoid damage. Its flexibility allows it to conform well to various keel shapes.
DIY vs. Professional Installation:
- DIY: Both products are manageable for the average boater with basic skills. Installation takes 30-60 minutes, with a mechanic’s crawler easing the process for larger boats like an 18 ft. center console. Following instructions meticulously—especially surface prep—ensures success.
- Professional: Recommended for those lacking confidence or time. Professional installation costs $200-$300 but guarantees proper alignment and adhesion, reducing the risk of peeling. If a DIY attempt fails, replacement costs ($150-$200) plus professional fees can total $500-$900.
Verdict: Installation is comparable, with KeelGuard’s spatula slightly preferred over KeelShield’s roller. DIY is feasible for your 18 ft. center console, but professional installation ensures peace of mind, especially in saltwater environments where adhesion is critical.
4. Performance and Speed Impact
A common question is whether keel protectors affect a boat’s top-end speed. Megaware claims KeelGuard’s grooved design creates hydrodynamic channels, potentially improving performance by reducing drag. KeelShield asserts it won’t slow the boat down. User experiences and physics provide clarity:
- Speed Impact: Most users, including those with high-performance bass boats running over 100 mph, report no noticeable speed loss with either product. For an 18 ft. center console, the keel is typically out of the water at planing speeds, minimizing drag. Any speed improvement from KeelGuard’s grooves is likely negligible and unverified by independent tests.
- Hooking Concerns: Some worry that keel protectors could cause “hooking” (sudden veering during sharp turns). Users with properly installed KeelGuard or KeelShield on various boats, including flats skiffs and bass boats, report no hooking issues when aligned correctly.
- Hydrodynamics: Both products are low-profile (KeelShield slightly thinner), ensuring minimal disruption to water flow. For tunnel-hull boats like the Sterling TR7, trimming to 5.5 ft. may be necessary to avoid interfering with water flow.
Verdict: Neither product significantly impacts speed or handling for your boat. Claims of speed improvement are likely marketing exaggerations.
5. Cost and Availability
Pricing varies by length and retailer, with both products offering sizes from 4 ft. to 12 ft.
| Product | Length (ft.) | Price Range (USD) | Retailers |
|---|---|---|---|
| KeelGuard | 6-8 | $137-$180 | Bass Pro Shops, Cabela’s, West Marine, Overton’s |
| KeelShield | 6-8 | $147-$200 | iboats, Amazon, direct from KeelShield |
- KeelGuard: Slightly cheaper, often $10-$20 less than KeelShield. Available in multiple colors (e.g., white, black, gray) to match your boat.
- KeelShield: Marginally pricier but offers a glossy finish and color options (up to 10, including black, white, and custom shades). Factory-installed on some brands, potentially reducing costs for new boats.
Verdict: KeelGuard is more budget-friendly, but the price difference is minimal. Choose based on performance and aesthetics rather than cost alone.
6. Coverage Recommendations
Coverage length depends on your boat’s size and beaching habits. Manufacturer charts recommend:
- 18 ft. Center Console: 6-7 ft. of coverage, starting 6-9 inches above the waterline and extending 3 inches beyond the keel’s lowest point.
- Rule of Thumb: Longer is better for frequent beaching, as it protects more of the keel when reversing off sandbars. However, avoid excessive length that could affect running pads or tunnel hulls. For flats skiffs, users often opt for 1-2 ft. longer than recommended for extra protection.
Chart: Decision Tree for Coverage Length
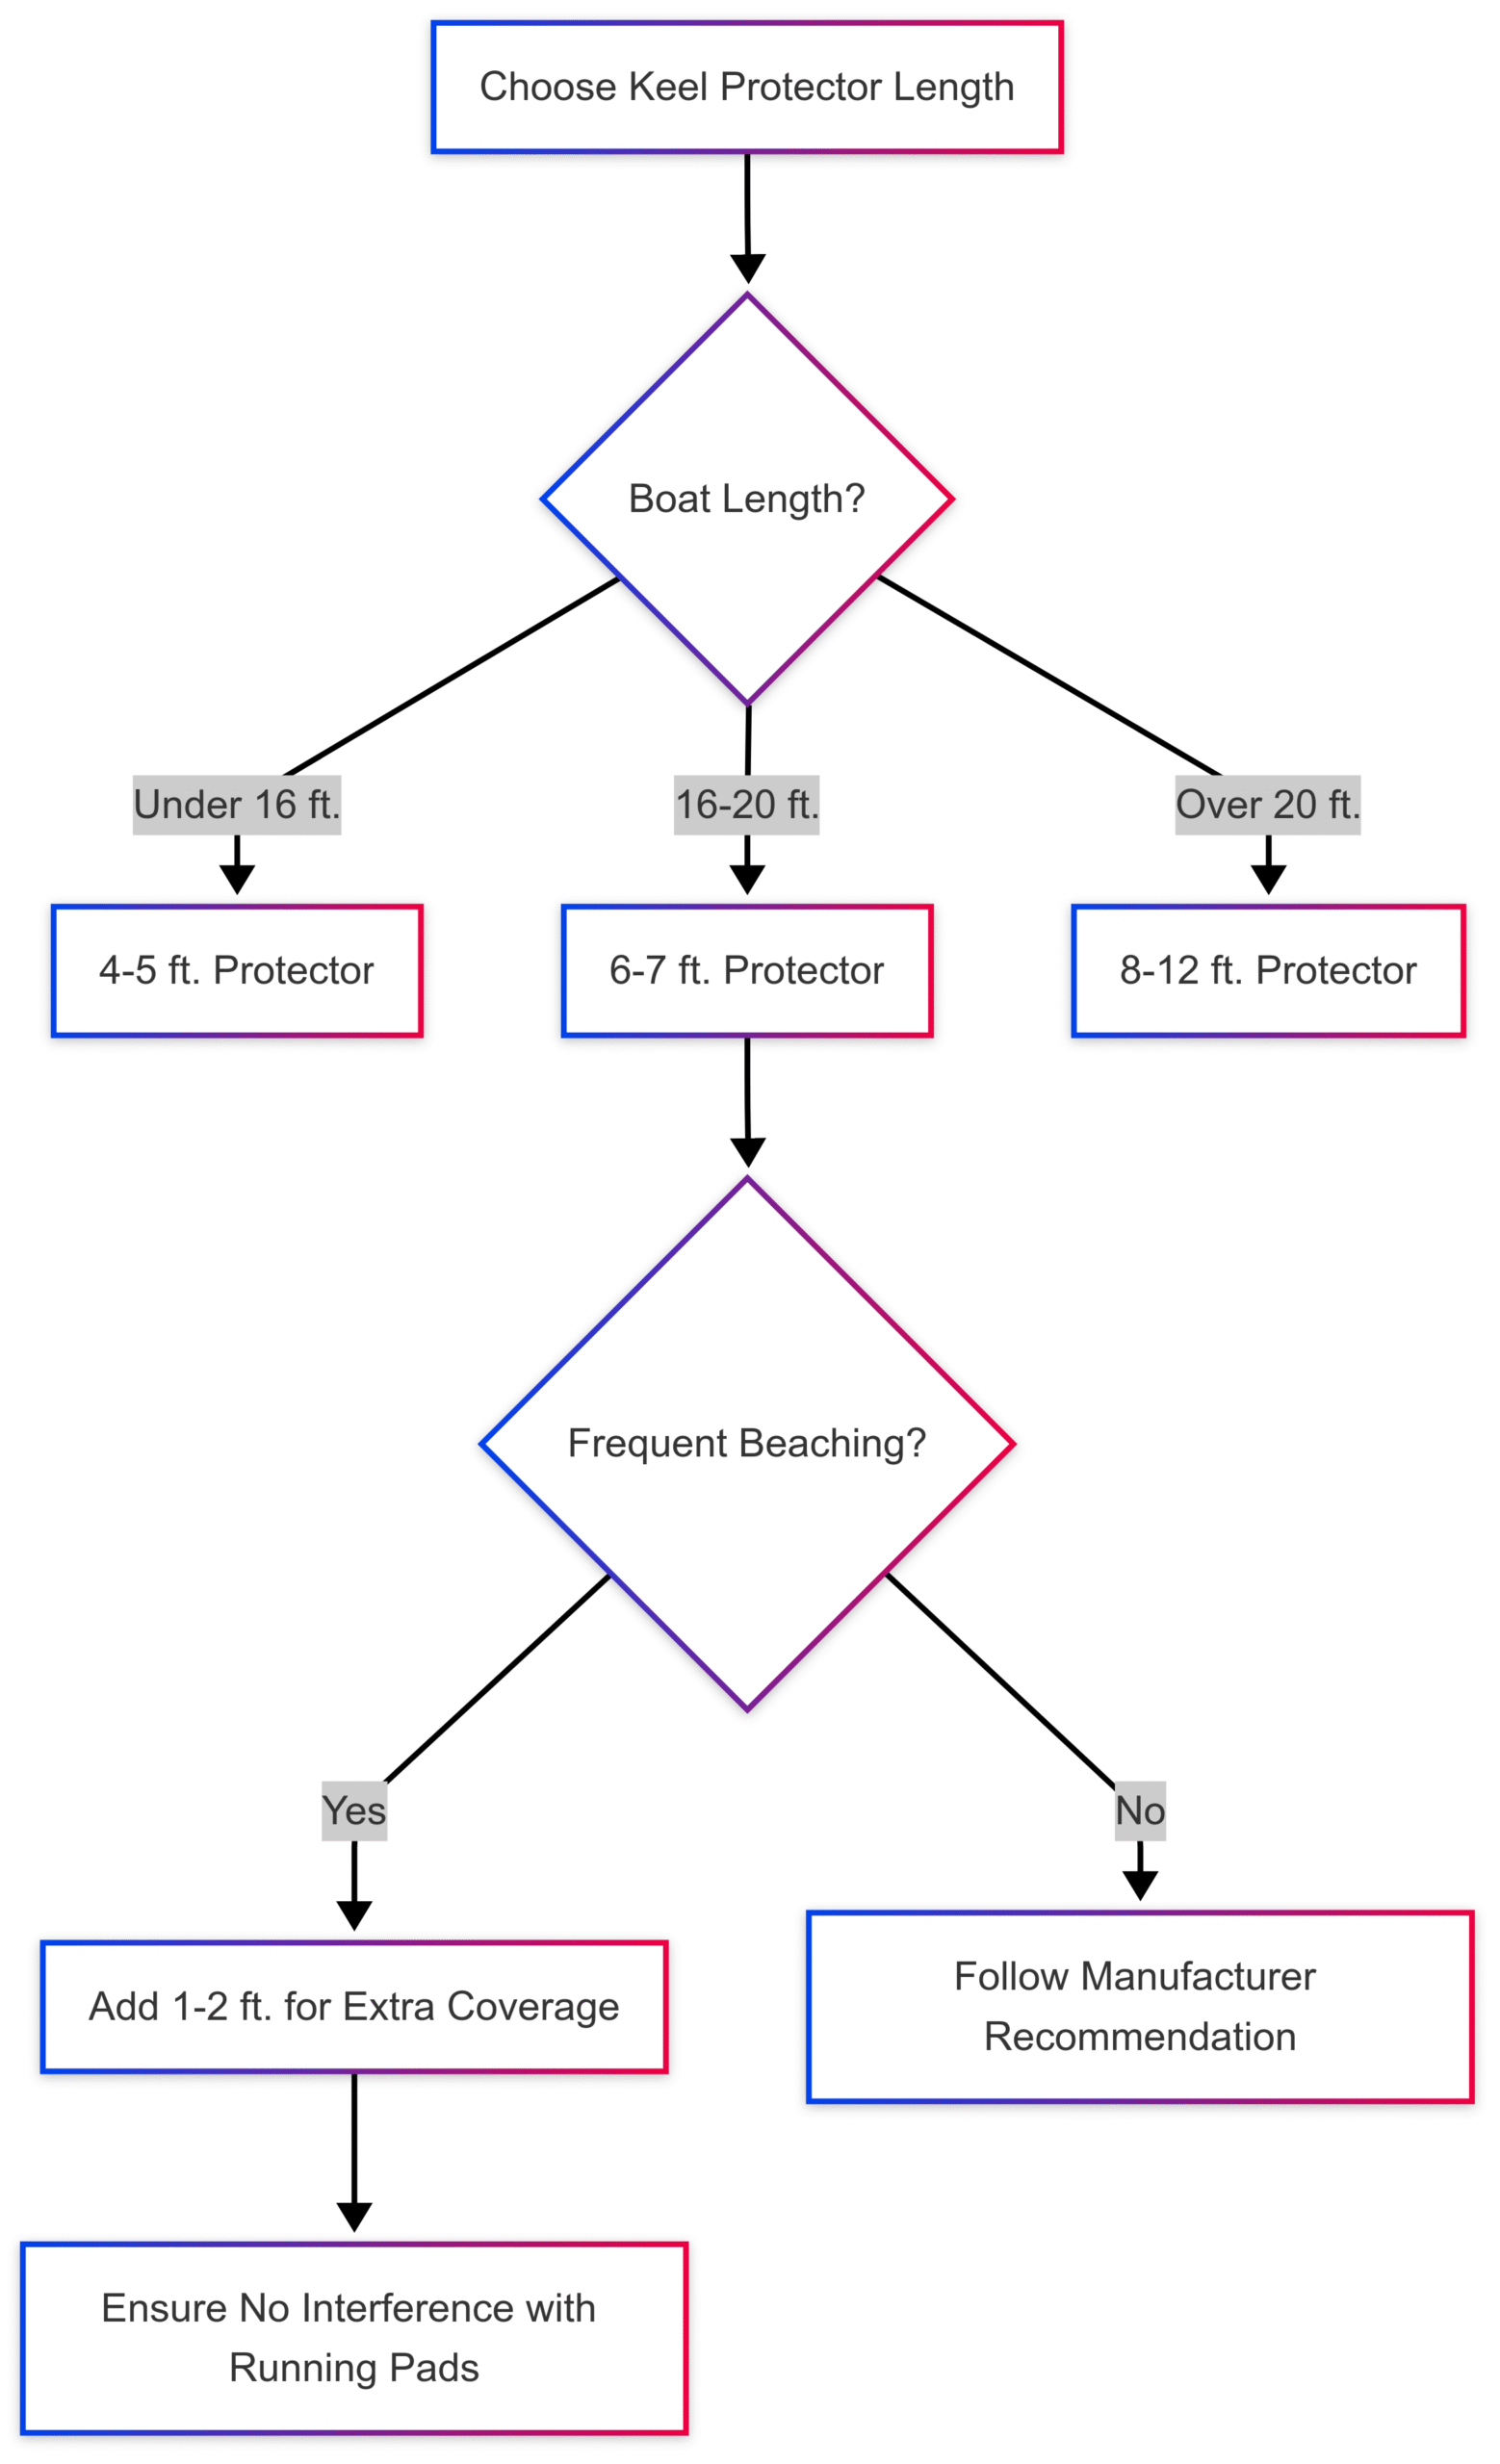
Verdict: For your 18 ft. center console, a 7 ft. protector is ideal, with 8 ft. for frequent beaching on sandy or shell bottoms. Ensure the tail end extends far enough to avoid catching when reversing.
Alternatives to KeelGuard and KeelShield
While KeelGuard and KeelShield dominate the DIY market, alternatives like Hamby’s Beaching Bumper and Line-X XTRA offer unique benefits.
1. Hamby’s Beaching Bumper
- Description: A premium keel protector, often factory-installed by brands like Ranger. Made from durable materials, it’s designed for heavy-duty protection.
- Pros:
- Exceptional durability, with users reporting no issues after years of concrete ramp beaching.
- Custom fit for specific boat models.
- Cons:
- Expensive ($300+).
- May require professional installation, increasing costs.
- Price: $300-$500, depending on length and installation.
- Suitability: Ideal for high-end boats or frequent concrete ramp users, but overkill for your 18 ft. center console unless budget allows.
2. Line-X XTRA
- Description: A spray-on polyurethane coating, customizable in thickness, width, and color (including white). Applied by certified professionals, it’s popular for duck boats and heavy-use vessels.
- Pros:
- Fully customizable, covering keel and hull areas that contact trailer bunks.
- Can be touched up or resprayed without removal, unlike adhesive protectors.
- Smooth application possible, with no speed loss reported.
- Cons:
- Requires professional application, costing $300-$500 for a full bottom.
- Surface prep (sanding, cleaning) is more involved.
- Price: $300 for a 16 ft. boat’s bottom, higher for larger vessels.
- Suitability: Excellent for saltwater use and trailer roller contact, as it won’t peel or catch. A strong contender for your boat if you prioritize longevity and customization.
Comparison Table: KeelGuard, KeelShield, Hamby’s, Line-X
| Feature | KeelGuard | KeelShield | Hamby’s | Line-X XTRA |
|---|---|---|---|---|
| Material | Polymer | Urethane Polymer | Proprietary | Polyurethane |
| Installation | DIY | DIY | Professional | Professional |
| Price (6-8 ft.) | $137-$180 | $147-$200 | $300-$500 | $300-$500 |
| Durability | High | Very High | Very High | Excellent |
| Customization | Trim-to-Fit | Trim-to-Fit | Model-Specific | Fully Custom |
| Trailer Roller Compatibility | No | No | Limited | Yes |
| Warranty | Lifetime | Lifetime | Varies | Varies |
Verdict: Line-X XTRA is the most versatile alternative, especially for saltwater and trailer roller use. Hamby’s is durable but costly. For your needs, KeelShield or KeelGuard remains the best balance of cost, performance, and DIY convenience.
Addressing Specific Concerns
1. Trailer Roller Compatibility
Both KeelGuard and KeelShield are not recommended for boats resting on trailer rollers, as the pressure can cause peeling or wear. If your 18 ft. center console uses a roller trailer, modify the trailer to use bunks or opt for Line-X XTRA, which withstands roller contact.
2. Saltwater Use
Saltwater environments demand robust adhesion and UV resistance. Both KeelGuard and KeelShield perform well, with KeelShield’s adhesive slightly superior. Line-X XTRA’s seamless application makes it ideal for corrosive saltwater conditions.
3. Removal and Replacement
Removing KeelGuard or KeelShield is challenging due to their strong adhesives. Use a heat gun, plastic spatula, WD-40, and isopropyl alcohol to clean residue. Line-X XTRA can be resprayed without removal, a significant advantage for long-term maintenance.
Installation Tips for Your 18 ft. Center Console
For a successful DIY installation:
- Timing: Install in warm weather (70°F or higher) for pliable material and better adhesion.
- Prep: Sand lightly, clean with isopropyl alcohol, and use the provided primer. Mask off surrounding areas to avoid hull scratches.
- Alignment: Mark the keel’s centerline with a grease pencil. Start 6-9 inches above the waterline and work in small sections.
- Tools: Use a stiff roller or squeegee to ensure a bubble-free bond. A friend’s help can keep the protector centered.
- Post-Installation: Apply marine-grade silicone around edges after 24 hours for extra security.
Video Resource: Watch TacticalBassin’s YouTube video on “How To Install A Keel Guard” for a visual guide.
Conclusion: Which Is Better?
For protecting your 18 ft. center console during routine beachings on sandy or shell bottoms, Gator Guards KeelShield edges out Megaware KeelGuard due to its superior adhesive strength, slightly better abrasion resistance, and glossy finish that resists scratching. Its factory use by brands like Triton and Nitro adds credibility. However, KeelGuard is a close second, offering a budget-friendly option with a user-friendly spatula applicator and excellent real-world performance.
Line-X XTRA is a compelling alternative if you prefer a custom, spray-on solution that handles trailer rollers and saltwater exposure. It’s pricier and requires professional application but offers unmatched longevity and ease of maintenance.
For coverage, a 7 ft. protector is recommended, with 8 ft. for frequent beaching. DIY installation is achievable with careful prep, but professional installation ($200-$300) ensures perfection, especially in saltwater. Neither product will improve top-end speed, but they won’t slow you down either.
Invest in a keel protector to safeguard your boat’s keel, enhance its value, and enjoy worry-free beaching. Whether you choose KeelShield, KeelGuard, or Line-X XTRA, your 18 ft. center console will thank you for the protection.
Happy Boating!
Share KeelGuard vs. KeelShield with your friends and leave a comment below with your thoughts.
Read Difference Between In-Hull and Thru-Hull Transducer until we meet in the next article.