Boat DIY Cover support Ideas for the winter
Discover DIY boat cover support ideas for winter, using durable fabrics and sturdy frames to protect your boat. Perfect for snow-prone areas like New Jersey.
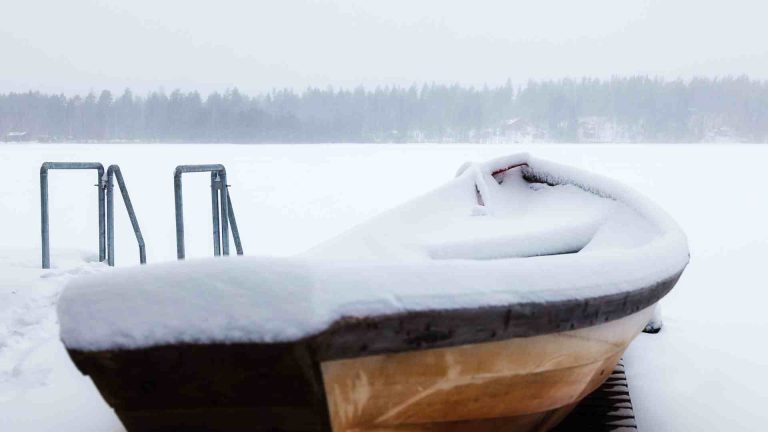
Winterizing a boat is a critical task for owners in regions like New Jersey, where snow, ice, and harsh weather can damage unprotected vessels. A well-designed DIY winter boat cover, supported by a sturdy frame, ensures your boat remains safe from moisture, mildew, and structural stress. This comprehensive guide explores practical and budget-friendly ideas for creating a durable winter boat cover, tailored for boats like the Aquasport 215 Sport (a dual console or bow rider) but adaptable to various boat types. We’ll cover material choices, support structures, installation tips, and maintenance strategies, incorporating insights from seasoned boaters and expert recommendations.
Why a DIY Winter Boat Cover Matters
A winter boat cover protects your investment from environmental hazards, including snow accumulation, ice formation, and wind-driven debris. Without proper coverage, boats can suffer from:
- Mildew and Mold: Trapped moisture leads to fabric and upholstery damage.
- Structural Stress: Snow and ice weight can deform covers or damage the hull.
- UV Degradation: Even in winter, UV rays can weaken materials.
- Critter Intrusion: Rodents and insects can nest in uncovered boats, causing costly repairs.
A DIY approach saves money compared to professional shrink-wrapping (which can cost $20 per foot or more) or custom covers ($1,600 or higher, as noted for a Fisher cover with a 10-year warranty). With materials like tarps ($30–$100) or marine-grade fabrics ($10–$20 per yard), and lumber or PVC for frames ($10–$50), you can create a reliable cover for under $200, reusable for multiple seasons.
Step 1: Choosing the Right Cover Material
The cover material is the first line of defense against winter elements. It must balance water resistance, breathability, and durability. Here are the top options:
Marine-Grade Fabrics
- Top Notch 9: A solution-dyed polyester with a fluorocarbon finish, offering excellent abrasion resistance and breathability. Ideal for large projects due to its reversible nature. Cost: ~$15–$18 per yard.
- Top Notch 11.5: Heavier than Top Notch 9, suited for larger boats or harsher climates. Cost: ~$18–$22 per yard.
- Top Gun: A hybrid polyester fabric with superior water resistance and durability. Cost: ~$16–$20 per yard.
- Sunbrella: An acrylic marine-grade fabric, highly durable but less abrasion-resistant than polyester options. Cost: ~$20–$25 per yard.
Why Choose Marine-Grade Fabrics?
These fabrics resist UV rays, mildew, and tearing, lasting 5–10 years with proper care. They’re breathable, reducing moisture buildup, and come in various colors for aesthetic appeal. Use a fabric calculator (available on sites like Sailrite) to estimate yardage based on your boat’s dimensions.
Heavy-Duty Tarps
- Sigman Brand (20×30 ft): A durable, white tarp costing ~$80, lasting 4–5 winters. Recommended for its UV resistance and strength.
- Harbor Freight (28×40 ft): A 1000-denier nylon tarp (11 mil) for ~$100, covering larger boats and lasting 2–3 years.
- Keten (10×20 ft, 16 mil): A UV-resistant, waterproof tarp for ~$39.98, ideal for smaller boats or budget-conscious owners.
Tarp Pros and Cons
- Pros: Affordable, widely available, and easy to replace. Heavy-duty options (12–16 mil) withstand snow and wind.
- Cons: Less breathable than marine-grade fabrics, requiring ventilation to prevent mildew. Cheaper tarps (e.g., blue 8-mil) tear easily and last only one season.
Recommendation for New Jersey
For an Aquasport 215 Sport, a 20×30 ft heavy-duty tarp (e.g., Sigman or Keten) or 15–20 yards of Top Notch 9 provides ample coverage. Ensure the material overlaps the hull by at least 1–2 feet for a secure fit.
Step 2: Preparing the Boat for Winter
Before installing the cover, prepare your boat to minimize damage risks:
- Clean and Dry: Wash the boat thoroughly, removing salt, dirt, and organic matter. Dry all surfaces, including upholstery and compartments, to prevent mildew.
- Protect Sensitive Areas: Cover windows, windshields, and sharp edges with pool noodles or plumbing insulation to prevent cover abrasion.
- Ventilation Points: Install vents (e.g., plastic tubing or grommets) to allow air circulation. A boater in Massachusetts used 10’ plastic gutter drains with 1.5” holes as vents, angled to prevent water ingress.
- Engine and Battery: Tilt the engine down to drain water, and remove batteries for indoor storage with a trickle charger. One boater used jumper cables to maintain engine connections, storing them in a weatherproof bag.
- Hull Protection: If storing outdoors, elevate the boat on a trailer or blocks to reduce ground moisture exposure.
Step 3: Building a Support Structure
A robust support structure prevents the cover from sagging under snow or pooling water, which can lead to tears or hull damage. Here are popular DIY frame ideas, tailored for snow-prone areas like New Jersey:
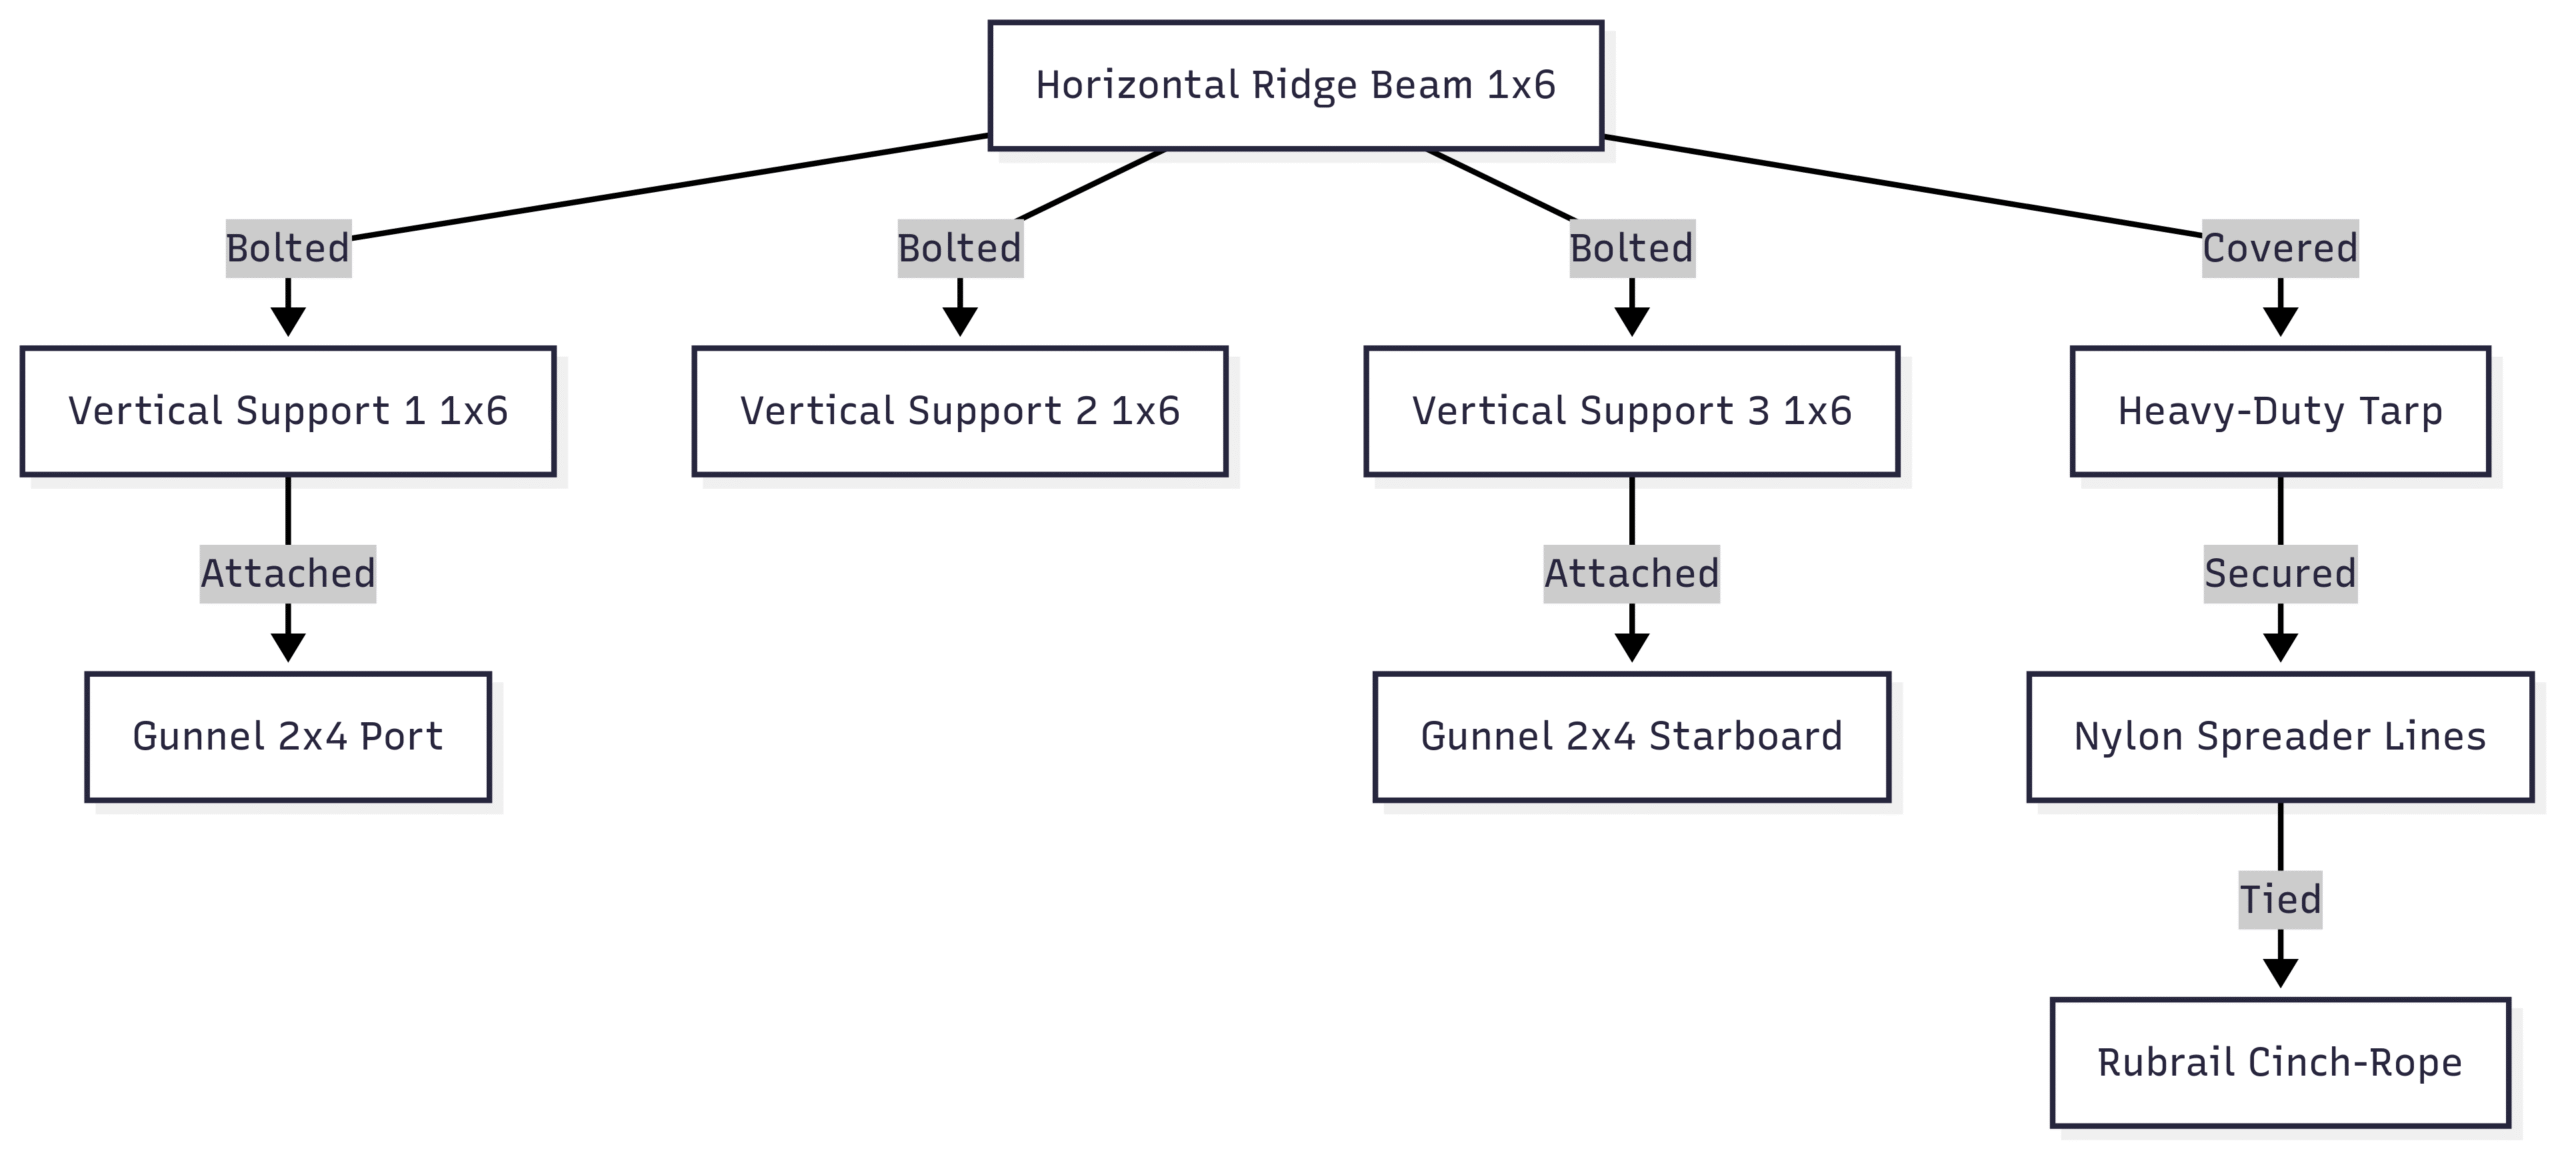
Option 1: Lumber-Based A-Frame
- Materials: 1×3 or 1×6 pressure-treated lumber ($2.50–$5 per 12 ft), 2x4s ($3–$5 each), carriage bolts, wing nuts, nylon webbing, and rubber padding.
- Design: Create a steep A-frame with two horizontal ridge beams (1×6) bolted to three vertical supports (1×6 or 2×4). Attach 2x4s along gunnels for stability. Use spreader lines to maintain a tent-like shape.
- Cost: ~$30–$50 for a 21 ft boat.
- Example: A Massachusetts boater used this setup for 20 years, replacing tarps every 2–3 years. The high ridge sheds snow effectively.
Diagram: Lumber A-Frame Structure
Option 2: PVC Pipe Frame
- Materials: 1.25” or 2” schedule 40 PVC pipes ($2–$4 per 10 ft), couplings, pool noodles, and ropes.
- Design: Construct a peaked frame with a central PVC pipe running bow to stern, supported by vertical pipes at the front and rear. Secure with ropes tied to cleats or rails.
- Cost: ~$20–$40.
- Pros: Lightweight, easy to assemble, and storable.
- Cons: May bend under heavy snow or wind, as reported by a boater in Alabama. Reinforce with ropes or use thicker pipes (2”).
- Example: A New Jersey boater used a 1.25” PVC frame for 20 years, replacing only a few couplings.
Option 3: Sawhorse and Ridge Pole
- Materials: Home Depot sawhorse brackets ($10–$15), 2x4s for legs, 1×4 or 1×6 for ridge pole, pool noodles, and ropes.
- Design: Place sawhorses at the bow and stern, connected by a long ridge pole. Secure with ropes to cleats and pad with noodles.
- Cost: ~$25–$45.
- Example: An Ontario boater used this for a 21 ft boat, tying ropes around tennis balls to secure the tarp without tearing.
Option 4: Ladder-Based Frame
- Materials: Old ladder ($0–$50 if purchased used), 2×4 for bow rail notch, and ropes.
- Design: Place a ladder on the deck, notched to the bow rail, and brace with 2x4s. Drape the tarp over the ladder for a steep pitch.
- Cost: ~$10–$50.
- Example: A New York boater used this minimalist approach for a walkaround boat, ensuring snow slides off easily.
Comparison Table: Support Structure Options
| Option | Cost | Durability | Snow Resistance | Ease of Assembly | Best For |
|---|---|---|---|---|---|
| Lumber A-Frame | $30–$50 | High (20+ yrs) | Excellent | Moderate | Long-term, snow-heavy areas |
| PVC Pipe Frame | $20–$40 | Moderate | Moderate | Easy | Light snow, budget-conscious |
| Sawhorse & Ridge | $25–$45 | High | Good | Moderate | DIYers with tools |
| Ladder-Based | $10–$50 | High | Good | Easy | Minimalist, small boats |
Recommendation for Aquasport 215 Sport
Given New Jersey’s snowy winters, a lumber A-frame or sawhorse setup offers the best snow resistance. PVC frames are viable if reinforced with ropes, but avoid thin pipes (e.g., 3/4”). Pad all contact points with pool noodles to protect the cover and hull.
Step 4: Installing the Cover
Proper installation ensures the cover remains secure and functional throughout winter. Follow these steps:
- Drape the Cover: Place the tarp or fabric over the frame, ensuring 1–2 ft of overhang on all sides. For a 21 ft boat, a 20×30 ft tarp provides sufficient coverage.
- Secure Fasteners: Use ropes, bungee cords, or ratchet straps to tie the cover to cleats, rails, or gunnels. A Boston boater used bungee cords on every grommet for a tight fit.
- Seal Seams: Overlap seams by 6–12 inches and apply waterproof tape or sealant to prevent leaks.
- Tension the Cover: Pull the cover taut to eliminate sags. A Maryland boater twisted the tarp at the bow to form a “trunk” for a critter-tight seal.
- Add Ventilation: Cut holes for vents (e.g., 8” plastic tubing) and reinforce with grommets. Angle vents downward to prevent water entry.
Pro Tip: Use a dual-line cinch-rope system (one above, one below the rubrail) with nylon twine loops every 2 ft to create a critter-proof seal, as suggested by a Massachusetts boater.
Step 5: Ongoing Maintenance
Regular maintenance extends the life of your cover and protects your boat:
- Inspect Weekly: Check for loose straps, tears, or snow buildup. Tighten fasteners as needed.
- Remove Snow and Ice: Use a soft broom to clear snow after storms to prevent weight stress. A Michigan boater noted that adjustable poles shed snow effectively with proper tension.
- Monitor Ventilation: Ensure vents remain clear of debris to maintain airflow.
- Repair Damage: Patch small tears with waterproof tape or sew reinforcement patches for fabric covers.
Alternative: Shrink-Wrapping
Some boaters prefer shrink-wrapping for its tight fit and professional look. However, it has drawbacks:
- Cost: $150–$400 per year for materials (e.g., $200 for a shrink-wrap gun, $150 for wrap). Professional services cost $20 per foot.
- Environmental Impact: Single-use plastic waste, as highlighted by a Massachusetts boater who opted for reusable tarps.
- Ventilation: Requires vents to prevent mildew, similar to tarps.
- DIY Feasibility: A Maine boater spent $900 on shrink-wrap supplies for 6 seasons ($150/year), reusing wrap for patio furniture.
Comparison Table: Tarp vs. Shrink-Wrap
| Aspect | Tarp | Shrink-Wrap |
|---|---|---|
| Cost per Year | $30–$100 (4–5 years) | $150–$400 (1–6 years) |
| Durability | 2–5 years | 1 season (reusable with care) |
| Eco-Friendliness | Reusable, recyclable | Single-use plastic waste |
| Ventilation | Requires vents | Requires vents |
| Ease of Install | Moderate (frame needed) | Moderate (gun required) |
Recommendation: For budget and eco-conscious boaters, tarps with a sturdy frame are superior. Shrink-wrapping suits those prioritizing aesthetics or lacking time for DIY frames.
Custom Fabric Cover: A Long-Term Investment
For dedicated DIYers, sewing a custom fabric cover offers unmatched durability and fit. A Sailrite video tutorial outlines the process, taking 3–4 days for a 21 ft boat. Key steps include:
- Patterning: Measure the boat and create paper patterns for fabric panels.
- Cutting and Sewing: Use Top Notch 9 or Top Gun, sewing panels with UV-resistant thread. Add zippers, webbing loops, and pleats for access and fit.
- Installation: Secure with snaps, ties, and straps for a snug fit.
Cost Breakdown
- Fabric: 20 yards of Top Notch 9 at $18/yard = $360.
- Tools and Supplies: Sewing machine ($200–$500, reusable), thread, zippers, snaps = $100–$200.
- Total: $460–$760 (one-time cost, lasts 8–10 years).
Pros: Custom fit, reusable, and professional-grade. Saves $1,000+ compared to commercial covers (e.g., Fisher’s $1,600 cover).
Cons: Time-intensive, requiring sewing skills and equipment.
Real-World Insights from Boaters
Boaters across forums shared creative solutions for winterizing boats like the Aquasport 215 Sport:
- New Jersey (Scode68): Considered a Budge 600 fabric cover ($200–$300) or a Tractor Supply tarp, paired with a PVC frame. Pool noodles protected windows.
- Massachusetts (cbigma): Used a 20-year-old lumber frame with a Harbor Freight tarp, adding gutter drain vents for airflow.
- Maine (Puck-n-Fish): Shrink-wrapped a 1800 model for $150/year, repurposing wrap for patio furniture.
- Ontario (Creekwood): Built a sawhorse frame with tennis balls to secure the tarp, preventing tears.
- Ohio (gem58): Used a 2” black PVC frame with a 30×40 ft tarp, allowing walk-through access and lasting 4 years.
These insights highlight the versatility of DIY solutions, with lumber and tarps being the most popular for cost and durability.
Conclusion
Creating a DIY winter boat cover for your Aquasport 215 Sport or similar vessel is a cost-effective way to protect your investment in snow-prone areas like New Jersey. By choosing a durable material (e.g., Top Notch 9 or a heavy-duty tarp), building a sturdy frame (lumber A-frame or reinforced PVC), and ensuring proper ventilation and tension, you can safeguard your boat for under $200. Regular maintenance and snow removal extend the cover’s life, saving thousands compared to shrink-wrapping or custom covers. Whether you opt for a minimalist ladder setup or a custom-sewn fabric cover, these solutions offer flexibility and reliability for winter storage.
Call to Action: Share your DIY boat cover tips in the comments, or contact us for fabric samples and tutorials to start your project today!
Happy Boating!
Share Boat DIY Cover support Ideas for the winter with your friends and leave a comment below with your thoughts.
Read How to Live on a Sailboat: Consider These 5 Things until we meet in the next article.