How to Build a Wooden Boat: Step by Step Guide
In the world of boat enthusiasts, there is a timeless allure to the art of wooden boat building. Crafted with passion and skill, building a wooden boat from scratch brings a sense of pride and connection to maritime traditions. The process of creating one’s watercraft masterpiece with one’s hands is a journey filled with satisfaction and a profound connection to the rich history of boat craftsmanship.
In this comprehensive step-by-step guide, we will delve into the world of wooden boat building and equip aspiring boat builders with the knowledge and skills needed to embark on this rewarding endeavor. Whether you are a seasoned woodworker or a novice eager to learn, this guide will take you through the intricacies of crafting a beautiful wooden boat, creating an enduring symbol of your passion for the sea. Let’s set sail on this journey together and uncover the magic of building a wooden boat from the ground up.
Importance of Selecting the Right Boat Design That Matches the Builder’s Needs and Skill Level
When embarking on the adventure of wooden boat building, selecting the right boat design is paramount to the success of your project. It sets the course for the entire construction process and ensures that the final result meets your needs and aligns with your skill level.
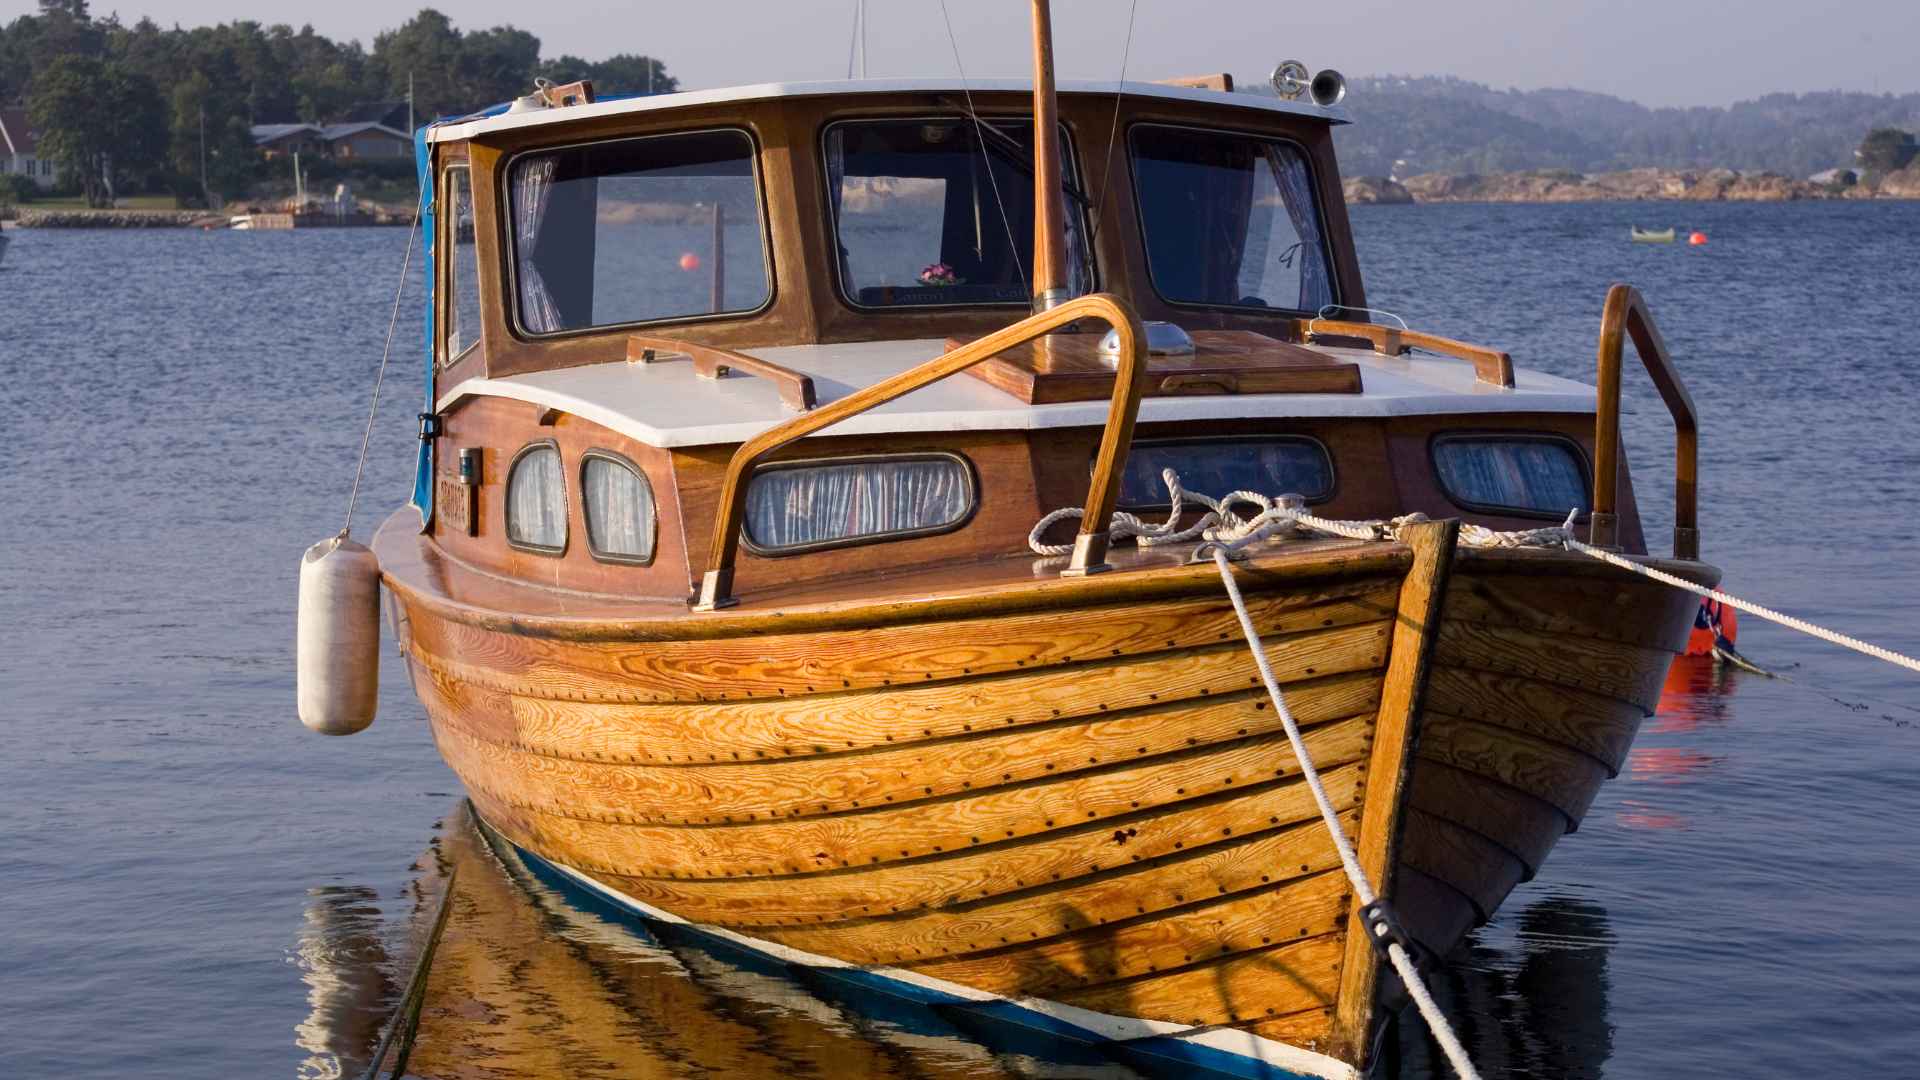
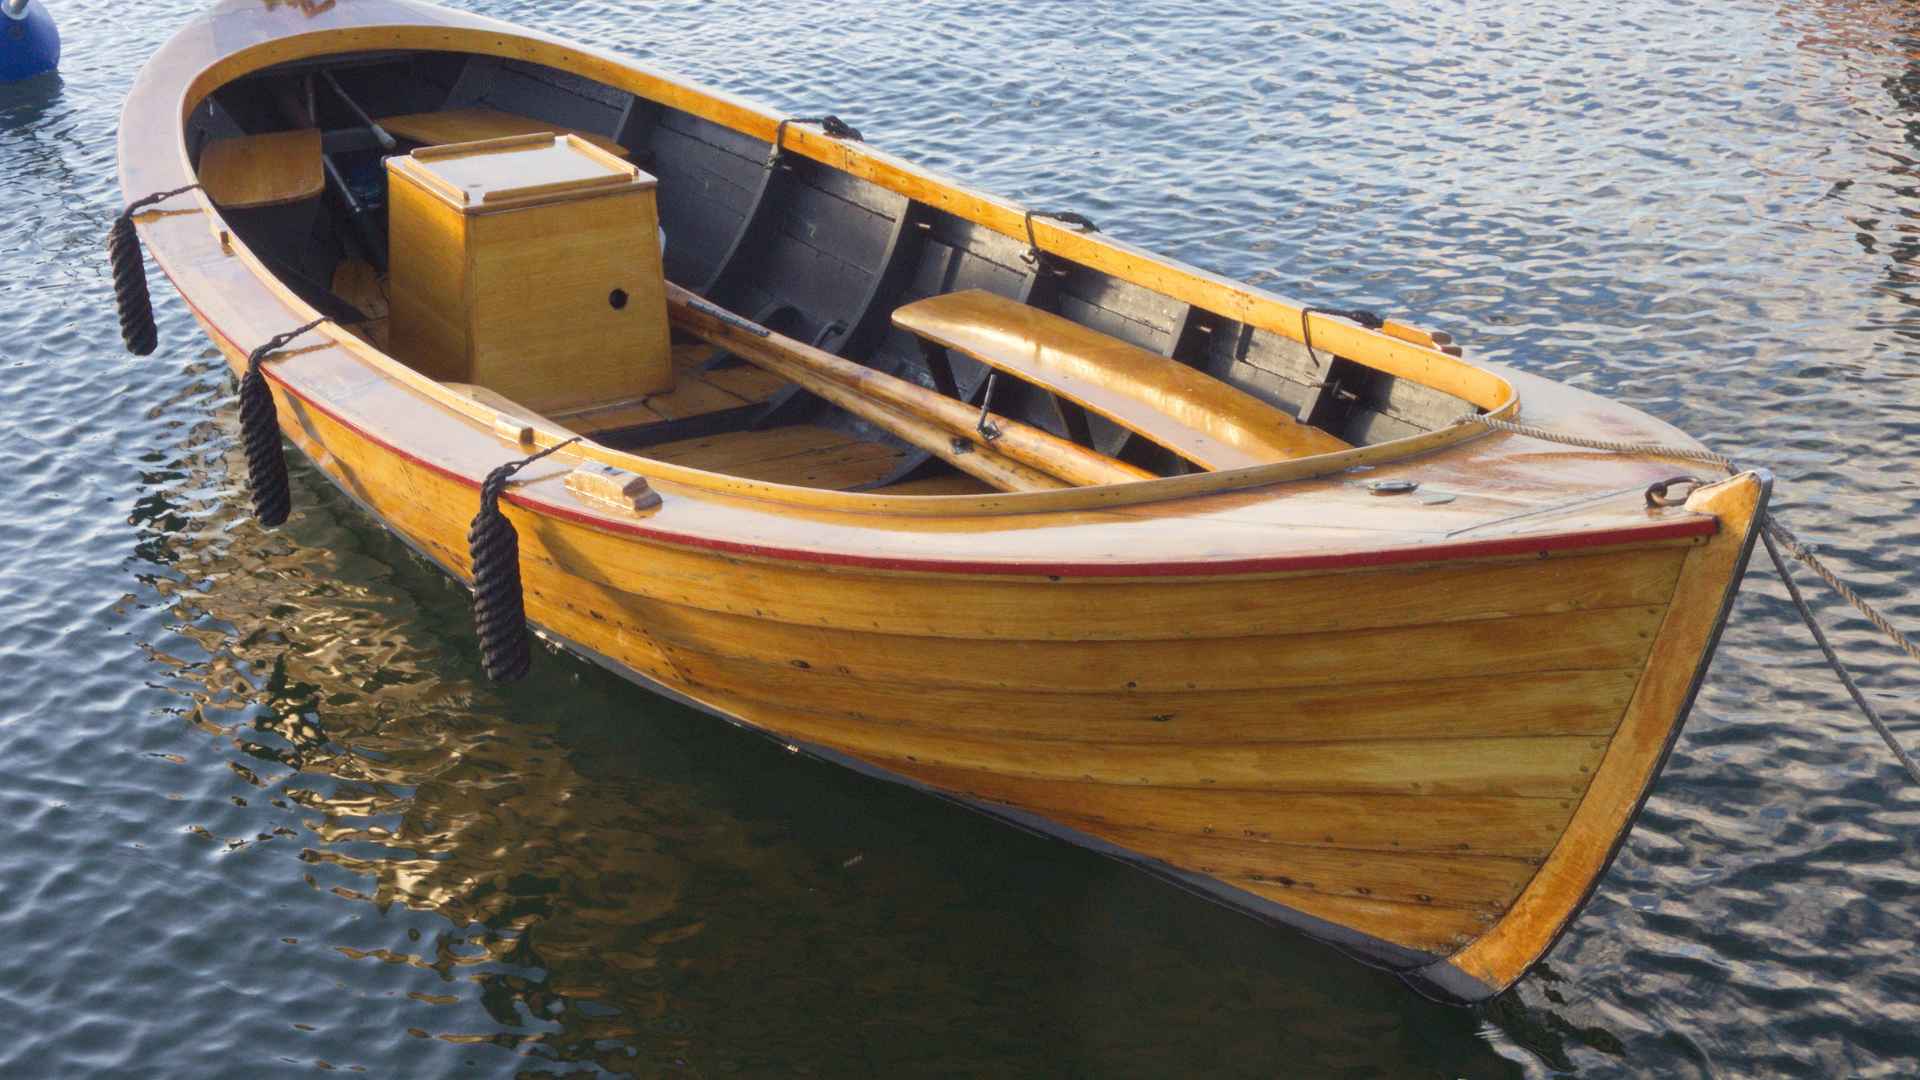
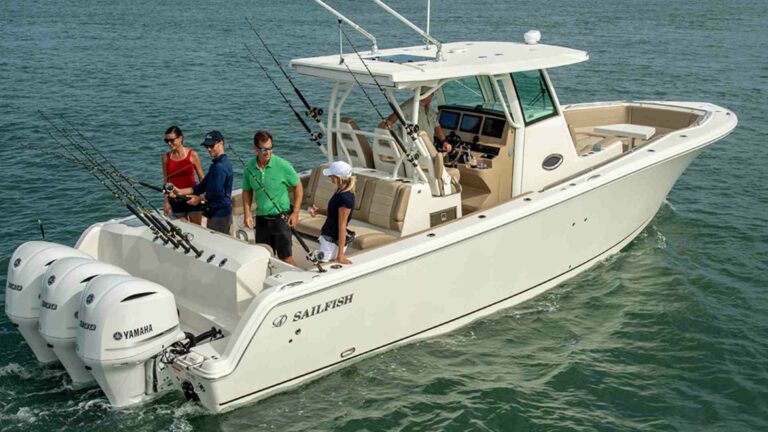
First and foremost, consider the purpose of your boat. Are you envisioning a small, nimble sailboat for leisurely cruises, a classic rowboat for peaceful afternoons on the lake, or a sturdy fishing boat for thrilling adventures at sea? Understanding the intended use of your boat will guide you toward the most suitable design.
Once you have a clear idea of the type of boat you wish to build, obtaining accurate and reliable boat plans or blueprints becomes crucial. These plans serve as your roadmap, providing detailed instructions on the boat’s dimensions, shape, and assembly. Seek out reputable sources for boat plans, such as established naval architects, boatbuilding institutions, or reliable online resources.
A well-crafted and comprehensive set of plans will ensure that you have the necessary information to carry out each step of the building process with precision. It also saves you from the frustration and disappointment of encountering unexpected challenges along the way.
Remember that choosing the right boat design is not just about aesthetics; it’s about functionality and ensuring that the boat serves your needs and dreams on the water. With the right design and reliable plans in hand, you’ll be ready to set sail on your wooden boat building journey with confidence and enthusiasm.
Comprehensive List of Tools and Materials Required for Building a Wooden Boat
Building a wooden boat requires a well-equipped workshop and a careful selection of high-quality materials. Before you start, make sure you have the following tools and materials ready:
Essential Tools:
- Saw: A variety of saws, including a handsaw, circular saw, and jigsaw, for cutting wood to size.
- Chisels: Different sizes of chisels for shaping and carving wood.
- Clamps: Various types of clamps, such as C-clamps and bar clamps, to hold pieces in place during assembly.
- Measuring Instruments: A tape measure, combination square, and level for precise measurements and alignments.
- Plane: A smoothing plane and block plane for shaping and smoothing wood surfaces.
- Screwdrivers: Phillips and flathead screwdrivers for assembling parts with screws.
- Hammer: A claw hammer for driving nails and a rubber mallet for gentle taps.
- Drill: A power drill with various drill bits for creating holes and installing hardware.
- Sanding Tools: Sandpaper in different grits and sanding blocks or orbital sanders for smoothing wood surfaces.
Essential Materials:
- Wood: Choose the appropriate type of wood for boat building. Common options include marine-grade plywood, mahogany, cedar, oak, and teak. Consider factors like durability, weight, and availability when selecting the wood.
- Epoxy Resin: High-quality epoxy resin for bonding wood joints and protecting against water penetration.
- Fiberglass Cloth: If you plan to add extra strength to the boat, consider using fiberglass cloth and epoxy to reinforce certain areas.
- Varnish or Paint: To protect the wood from moisture and enhance its appearance, you’ll need marine-grade varnish or paint.
- Fasteners: Stainless steel screws, nails, and bolts for assembling the boat securely.
Before purchasing the materials, review your boat plans to determine the quantities required for each component. Investing in good-quality tools and materials will ensure a smoother and more successful boat-building experience, resulting in a beautiful and seaworthy wooden boat to be proud of.
Importance of Setting Up a Suitable Work Area for Boat Construction
Setting up a suitable work area is crucial for a smooth and successful boat-building project. Here are some essential considerations to ensure an organized, efficient, and safe work environment:
- Space and Ventilation: Choose a well-ventilated area with ample space to accommodate the boat’s size and allow free movement around it. Adequate ventilation is essential when working with epoxy resin and other chemicals to ensure a healthy work environment.
- Shelter and Protection: If possible, work indoors or under a covered area to protect the boat and materials from the elements. This also provides a stable environment and prevents any weather-related delays.
- Workbench and Storage: Set up a sturdy workbench to serve as your primary work area. Organize your tools neatly on the workbench or nearby shelves for easy access. Having a designated storage area for materials and hardware will help you stay organized throughout the project.
- Safety Measures: Prioritize safety by wearing appropriate personal protective equipment (PPE) such as safety goggles, ear protection, and dust masks. Ensure there are first-aid supplies readily available in case of any accidents.
- Lighting: Sufficient lighting is crucial for accuracy and precision during boat construction. Consider using additional lighting sources to avoid shadows or poorly illuminated areas.
- Cleanliness: Keep your work area clean and free from clutter. Regularly sweep the floor and remove any sawdust or debris that may accumulate during the building process.
- Access to Power: Make sure you have easy access to electrical outlets for your power tools. Consider using extension cords if needed, but ensure they are safely placed to prevent tripping hazards.
- Work Plan: Create a detailed work plan and timeline for your boat-building project. This will help you stay on track and ensure that each step is completed in the right sequence.
By carefully organizing and preparing your work area, you’ll create a conducive environment for building your wooden boat efficiently and with greater enjoyment. A well-prepared work area will also contribute to the overall quality and craftsmanship of your finished boat.
Process of Lofting, Which Involves Drawing Full-Sized Boat Lines on the Building Surface
Lofting is a fundamental step in wooden boat building, where you transfer the boat’s lines and measurements from the plans onto full-sized wooden boards or planks. This process ensures accuracy in creating the boat’s shape and proportions. Here’s a step-by-step guide on how to loft and transfer the boat plans:
- Prepare the Building Surface: Select a smooth, level, and clean surface for lofting. Common choices include a large table or a clean floor covered with building paper or plastic sheeting to prevent damage to the plans and wood.
- Obtain Full-Sized Boat Plans: Ensure you have complete, accurate, and full-sized boat plans. These plans typically include cross-sectional views, body lines, and other necessary details to guide you through the lofting process.
- Set Up the Baseline: The baseline is a horizontal reference line on the building surface that serves as a starting point for lofting. Use a straight, level batten or a string line to establish the baseline at the boat’s waterline or keel.
- Trace Body Lines: Start by tracing the body lines (station lines) from the plans onto the building surface. Use a pencil or chalk line to mark each station accurately along the baseline. These body lines represent the boat’s shape at specific intervals (usually spaced a few inches apart).
- Use Battens and Fairing: Once all the station lines are marked, use flexible battens or thin, straight boards to connect the points on each station. This process, called fairing, helps ensure smooth and fair curves between the stations. Adjust the battens until the lines are fair and symmetrical.
- Check Measurements: Regularly check and re-measure the lines to confirm accuracy. Small errors during lofting can compound and affect the boat’s final shape, so precision is crucial.
- Transferring to Wooden Boards: After lofting on the building surface is complete and verified, transfer the body lines and measurements onto the wooden boards or planks that will form the boat’s structure. Use the lofted lines as templates to mark the corresponding points on the wood.
- Cut and Shape Wooden Components: Use the lofted lines on the wooden boards to guide your cutting and shaping of the boat’s components, such as frames, keel, stem, and transom.
Lofting may seem challenging at first, but it is an essential step to ensure the accuracy and integrity of your boat’s design. Taking the time to loft carefully will lead to a well-proportioned and beautiful wooden boat.
Step-By-Step Guide on Constructing the Boat’s Frames or Ribs
Constructing the boat’s frames or ribs is a critical step in wooden boat building, as these frames provide the structural framework for the entire vessel. Here’s a step-by-step guide on how to construct the frames and assemble them on the building platform:
- Prepare Frame Material: Using the wooden boards or planks previously cut during the lofting process, prepare the material for the frames. Ensure that the wood is of suitable quality and free from defects.
- Create Frame Templates: Using the lofted lines as templates, trace the shape of each frame onto the wooden boards. Cut out the frame shapes with precision to ensure accurate replication of the design.
- Shape the Frames: Using hand tools such as chisels, planes, and spoke shaves, carefully shape the frames to achieve smooth curves and accurate dimensions. Check the shape against the lofted lines regularly to maintain accuracy.
- Bevel the Frame Edges: Depending on the boat’s design, bevel the edges of the frames where they will meet the keel and other components. Beveling ensures a tight fit and proper alignment during assembly.
- Assemble the Frames: Place the prepared frames on the building platform according to the boat’s design and lofted lines. Use temporary fasteners like screws or clamps to hold the frames in place temporarily.
- Check Alignment and Leveling: Ensure that the frames are correctly aligned and leveled. Use a spirit level to check the vertical alignment of the frames and ensure they are plumb. Check that the frames are level and true in all directions.
- Secure Frames in Place: Once you have verified that the frames are correctly aligned, secure them in place permanently. For temporary fasteners, replace them with permanent fasteners such as nails or screws.
- Install Keel and Other Components: With the frames in place, proceed to install the keel and other structural components of the boat. These components will further strengthen the frame assembly.
- Check for Fairness: After assembling the frames and structural components, check the boat’s overall fairness by visually inspecting the lines and curves. Make any necessary adjustments to achieve a smooth and fair hull shape.
Constructing and assembling the frames is a crucial phase in wooden boat building. Attention to detail and precision during this process will result in a strong and well-aligned frame structure, setting the foundation for the rest of the boat’s construction.
Process of Planking the Boat’s Hull, Including Attaching the Wooden Planks to the Frames

Planking the boat’s hull is a significant step in wooden boat building, as it forms the outer skin of the vessel and contributes to its strength and integrity. Here’s a detailed guide on how to plank the boat’s hull and ensure a robust and watertight construction:
- Selecting Plank Material: Choose high-quality wood for the planks, considering factors such as strength, durability, and resistance to rot. Common choices for boat planking include mahogany, oak, cedar, and marine-grade plywood.
- Preparing Planks: Mill the planks to the required thickness and dimensions. They should be accurately shaped to fit the curvature of the hull and align with the frames.
- Soaking Planks: Prior to installation, soak the planks in water to make them more flexible. This process, known as “steaming” or “soaking,” allows the planks to bend and conform to the hull’s curvature more easily.
- Starting the Planking Process: Begin planking from the keel, attaching the first plank along the centerline of the boat. Secure it in place with temporary fasteners or clamps.
- Fastening the Planks: Use the appropriate fastening method to secure the planks to the frames. Traditional wooden boat building methods may involve copper rivets and roves, while modern construction may use stainless steel screws.
- Overlapping Planks: Overlap each plank with the adjacent one to create a tight and watertight fit. The amount of overlap will depend on the boat’s design and construction techniques.
- Caulking and Sealing: To ensure a watertight hull, traditional boatbuilders may use oakum and caulking compound between the planks. Modern builders may use epoxy or other sealants to achieve a similar effect.
- Ensuring Curvature: Maintain the correct curvature of the hull as you progress with planking. Carefully shape and trim the planks to ensure they follow the boat’s design lines and create a smooth hull shape.
- Filling and Fairing: Once the planking is complete, fill any gaps or irregularities between the planks with an appropriate filler material. Fair the hull by sanding and shaping to achieve a smooth and uniform surface.
- Finishing Touches: Sand the hull to a smooth finish, ready for varnishing or painting, depending on your preference and the boat’s design.
Planking is a critical stage in wooden boat building, requiring precision and attention to detail. By properly fastening and shaping the planks, you’ll create a strong and beautiful hull that forms the foundation of your handcrafted watercraft.
Final Stages of Boat Construction, Including Sanding, Sealing, and Painting the Wooden Boat
The final stages of boat construction involve adding the finishing touches to the wooden boat, transforming it into a beautiful and fully functional watercraft. Here’s a step-by-step guide on how to complete the finishing and detailing process:
- Sanding: After planking and fairing the hull, sand the entire boat to achieve a smooth and even surface. Use progressively finer grit sandpaper to achieve the desired level of smoothness.
- Sealing: Apply a sealer or wood preservative to protect the wooden surfaces from water damage and decay. This step is particularly crucial for ensuring the longevity of the boat, especially in marine environments.
- Painting or Varnishing: Choose whether to paint or varnish the boat’s exterior. Both options offer protection and enhance the boat’s appearance. Paint provides a colorful finish, while varnish highlights the natural beauty of the wood grain.
- Installing Hardware and Fittings: Attach hardware, such as cleats, hinges, handles, and rails, to the boat. Ensure that all fittings are securely fastened and properly aligned for safety and functionality.
- Seating and Interior: Install seating and any other interior elements, such as storage compartments, as per the boat’s design. Ensure that the interior is comfortable and functional, allowing for a pleasant boating experience.
- Applying Non-Skid Surface (Optional): Consider applying a non-skid surface on deck areas for safety. Various non-skid products are available that provide traction even in wet conditions.
- Electrical and Mechanical Systems (if applicable): If your boat has electrical or mechanical systems, such as navigation lights, bilge pumps, or a marine engine, ensure they are properly installed and functioning correctly.
- Quality Control: Perform a thorough inspection of the boat to ensure that all components are correctly installed and functioning as intended. Address any issues or discrepancies promptly.
- Final Touches: Pay attention to small details, such as adding decorative elements or boat name lettering, to give your boat a personalized touch.
- Test Run and Launch: Before taking your boat on its maiden voyage, perform a test run in calm waters to ensure everything is in working order. Once you’re satisfied, launch your wooden boat into the water and enjoy the fruit of your labor.
Attention to detail is crucial in the finishing and detailing stage, as it determines the boat’s overall aesthetics and functionality. By following these steps and putting care into each aspect of the process, you’ll achieve a polished and aesthetically pleasing result that will make your wooden boat a source of pride and joy for years to come.
Excitement of Launching the Newly Built Wooden Boat into the Water

The moment of launching a newly built wooden boat into the water is undoubtedly an exhilarating experience for any boat builder. It marks the culmination of hard work, dedication, and passion, turning a pile of wooden planks into a functional watercraft. Here’s what you need to know about launching and testing your boat:
- Excitement of Launching: Launch day is a special occasion that celebrates the completion of your boat-building journey. It’s a time to share your accomplishment with friends and family who have supported you throughout the process. The sight of your wooden boat gliding into the water for the first time can be both thrilling and emotional.
- Preparing for the Maiden Voyage: Before launching, ensure that all safety equipment, such as life jackets, fire extinguishers, and distress signals, is on board and easily accessible. Double-check that the boat’s interior and hardware are secure, and there are no loose items that could shift during the journey.
- Testing Stability and Buoyancy: During the maiden voyage, carefully observe how the boat performs in the water. Pay attention to its stability, buoyancy, and responsiveness to the helm. Check for any signs of water leakage or unusual behavior. Be cautious and take the boat at a slow and controlled pace during the initial tests.
- Fine-Tuning the Boat’s Performance: It’s common for adjustments to be necessary after the maiden voyage. You may need to fine-tune the boat’s balance, trim, or weight distribution to achieve optimal performance. Small modifications may be needed to enhance stability and handling, and you can make these adjustments gradually until you’re satisfied with the boat’s performance.
- Learning and Adapting: Every boat has its unique characteristics, and the initial voyages will help you learn more about your boat’s behavior. Take note of how it responds to different conditions and how it handles waves and currents. This learning process will help you become a more skilled boat operator over time.
- Seeking Expert Advice: If you encounter any issues during the testing phase or are unsure about how to fine-tune your boat’s performance, consider seeking advice from experienced boat builders or maritime experts. Their insights can prove invaluable in understanding and resolving any challenges.
Launching and testing your wooden boat marks the beginning of a new chapter in your boating journey. Be patient with the learning process and enjoy the experience of getting to know your creation on the water. With time and experience, you’ll gain confidence in your boat’s capabilities, and the joy of cruising on a boat you’ve built with your own hands will be a truly gratifying and fulfilling experience.
Watch 10 minute boat build – boat build start to finish | Video
Top 5 FAQs and answers related to How to build a wooden boat
How long does it take to build a wooden boat?
Can I build a wooden boat as a beginner?
What type of wood is best for building a wooden boat?
Do I need any special skills or tools to build a wooden boat?
How much does it cost to build a wooden boat?
Conclusion

In conclusion, this comprehensive guide has explored the process of building a wooden boat, from selecting the right design and acquiring reliable boat plans to the final stages of launching and testing. We have highlighted the importance of choosing suitable materials, creating a proper work environment, and paying attention to detail throughout the construction process.
Building a wooden boat is a fulfilling endeavor that allows boat enthusiasts to connect with maritime traditions and experience the satisfaction of creating their watercraft masterpiece. With the right guidance, even beginners can undertake this rewarding project and see it through to completion.
We encourage aspiring boat builders to approach this journey with patience, dedication, and a willingness to learn. The process may require time and effort, but the joy of sailing the waters in a self-crafted boat is incomparable. Remember, each step is an opportunity to refine skills and bring the boat closer to its full potential.
With the knowledge gained from this guide, readers can confidently take on the art of wooden boat building. Whether it’s a small dinghy or a majestic sailboat, their handcrafted wooden boat will become a cherished possession and a testament to their passion for both woodworking and boating.
As the boat glides across the water, they can proudly celebrate the artistry and craftsmanship that went into making their dream vessel a reality. So, set sail on this incredible journey and embrace the rewards of building and sailing a wooden boat of your own making!
Share How to Build a Wooden Boat: Step by Step Guide with your friends and Leave a comment below with your thoughts.
Read How to Remove Barnacles from Your Boat: Step-By-Step Guide until we meet in the next article.


I’ve always wanted to build my own boat, and this guide made it so much easier! The steps are clear, easy to follow, and full of helpful tips. Definitely a great resource for beginners!
Building a wooden boat from scratch has always been a dream of mine, and this guide made it feel possible! The step-by-step instructions are easy to follow, and the detailed tool and material lists helped me get everything right. I especially loved the tips on creating the perfect workspace. The whole process was so rewarding, and now I have a beautiful boat to show for it. Highly recommend for anyone looking to dive into boat building!
Building a wooden boat has always been on my bucket list, and this guide made it seem possible! The step-by-step instructions are easy to follow, with helpful tips on tools, materials, and safety. I feel more confident in starting my project now. The author clearly knows their stuff and presents everything in a straightforward way. Highly recommend for anyone looking to build their first boat!
This guide is a fantastic resource for anyone looking to build a wooden boat. The step-by-step instructions are clear and easy to follow, making the process less intimidating for beginners. The tips and details provided really help ensure success, and the visuals are a great addition to the instructions.
Clear and practical guide! The step-by-step instructions are easy to follow, even for a beginner. I appreciated the detailed tips and diagrams—it made the whole process feel doable. Great read for anyone interested in building their own wooden boat.
This guide offers a clear and practical step-by-step approach to building a wooden boat, perfect for beginners. The instructions are detailed yet straightforward, and the accompanying tips make the process easier to follow. Overall, it’s a helpful resource for anyone interested in wood boat construction.
Clear and practical guide with easy-to-follow steps—perfect for beginners. Loved the detailed explanations and helpful visuals. Makes building a wooden boat feel totally achievable.
Clear and easy-to-follow guide! Loved the step-by-step approach—perfect for beginners. It made a complex project feel doable and fun. Great resource for anyone interested in wooden boat building.
Clear and easy-to-follow guide! Each step is well explained, making it perfect for beginners. Loved the practical tips and visuals—really helped me understand the process better.
This step-by-step guide made building a wooden boat feel approachable and clear. The detailed instructions and helpful tips were perfect for a beginner like me. Highly recommend for DIY enthusiasts!