Is 5 days too long to flush outboard after using it in saltwater?
Learn how to flush an outboard motor after saltwater use, optimal timing, and whether 5 days is too long to wait. Expert tips and manufacturer advice included.
Saltwater boating offers unparalleled adventure, but it comes with a critical maintenance task: flushing your outboard motor. Saltwater’s corrosive nature can wreak havoc on an engine’s cooling system if not addressed promptly. This guide explores how to properly flush an outboard motor, addresses whether five days is too long to wait, and answers common questions about flushing frequency, methods, and necessity. With insights from boaters, manufacturers, and marine experts, we’ll provide a comprehensive roadmap to keep your outboard running smoothly for years.
Why Flushing Your Outboard Motor Matters
Saltwater contains dissolved salts that can crystallize inside an outboard motor’s cooling passages, leading to corrosion, blockages, and overheating. These issues can reduce engine performance, cause costly repairs, or even lead to complete engine failure. Flushing with fresh water removes salt residue, sediment, and debris, preserving the engine’s internal components, particularly the cooling system, water pump impeller, and thermostat.
Regular flushing is especially critical for outboards used in saltwater environments. According to marine experts, neglecting to flush can result in salt buildup that restricts water flow, potentially causing the engine to overheat. Manufacturers like Yamaha, Mercury, and Suzuki unanimously recommend flushing after every saltwater use to ensure longevity.
How to Flush an Outboard Motor: Step-by-Step
Flushing an outboard motor is a straightforward process, but it requires attention to detail to avoid damaging the engine. Below is a detailed guide to the most common flushing methods.
1. Using Flush Muffs (Ear Muffs)
Flush muffs are the most traditional and widely used method for flushing outboard motors. These rubber cups fit over the water intake ports on the gearcase and connect to a garden hose.
Steps:
- Attach the Flush Muffs: Secure the muffs over the water intake ports on the lower unit. Ensure a tight seal to prevent water leakage.
- Connect the Hose: Attach a garden hose to the flush muffs.
- Turn on the Water: Start the water flow to ensure a steady supply.
- Start the Engine: Run the engine at idle speed in neutral for 5-10 minutes. Check the tell-tale (overboard water indicator) to confirm water is flowing through the engine.
- Monitor the Process: Stay with the boat to ensure the muffs remain in place and water flows consistently.
- Shut Down: Turn off the engine first, then the water supply to avoid water ingestion.
Precautions:
- Never run the engine without water, as this can damage the water pump impeller.
- Ensure all water intakes are covered or sealed with duct tape if necessary.
- Remove the propeller for safety if required by the manufacturer.
Cost: Flush muffs typically cost $10-$20 at marine retailers like West Marine or Amazon.
2. Using a Built-In Flush Port
Many modern outboards (built in the last 10-15 years) feature a built-in flush port, often located on the port side of the midsection or under the cowl. This method is convenient as it often doesn’t require running the engine.
Steps:
- Locate the Flush Port: Check your owner’s manual for the exact location.
- Connect the Hose: Attach a garden hose to the flush port using the appropriate adapter (snap or threaded).
- Turn on the Water: Let water flow for 10-15 minutes, as recommended by the manufacturer.
- Drain the Engine: Tilt the engine down to ensure all water drains out.
Precautions:
- Avoid cross-threading the hose adapter, especially on plastic fittings.
- Do not run the engine unless specified by the manufacturer.
Cost: Adapters for flush ports cost $5-$15, depending on the brand.
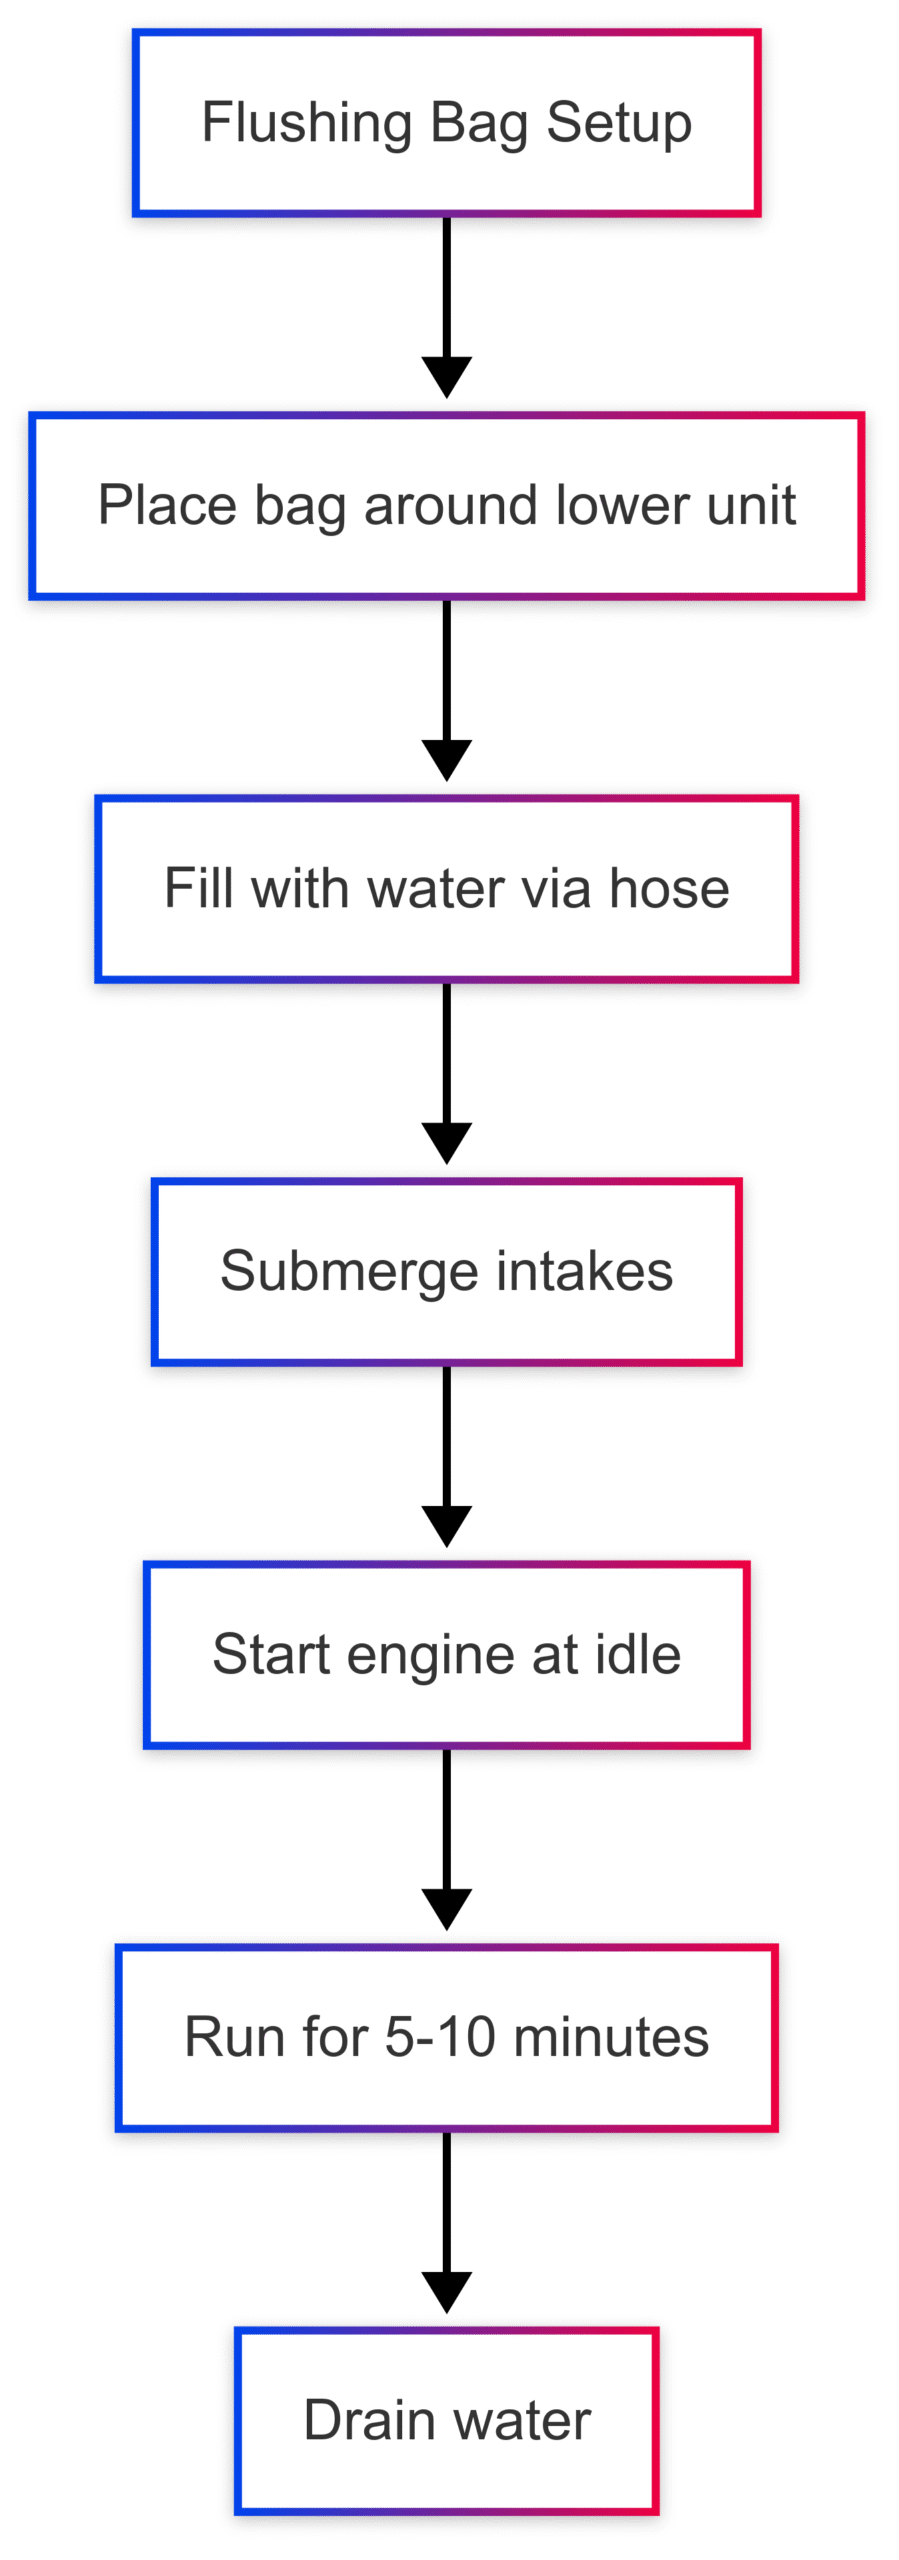
3. Using a Flushing Bag or Bucket
A flushing bag or bucket is ideal for smaller outboards or when muffs are impractical. These soft-sided containers encase the lower unit and maintain a water reservoir.
Steps:
- Set Up the Bag/Bucket: Place the bag or bucket around the lower unit, ensuring the water intakes are submerged.
- Connect the Hose: Attach a garden.assets/Flushing_Bag_Diagram.mmd
- Start the Engine: Run at idle in neutral for 5-10 minutes, ensuring water flow from the tell-tale.
- Shut Down and Drain: Turn off the engine, remove the bag, and tilt the engine to drain.
Precautions:
- Remove the propeller if required.
- Ensure the bag fits snugly to avoid leaks.
Cost: Flushing bags range from $30-$50; buckets can be repurposed or cost $10-$20.
4. Using Salt-Away or Flushing Solutions
Some boaters use salt-dissolving solutions like Salt-Away to enhance flushing. These products are mixed with water and circulated through the engine to break down salt crystals.
Steps:
- Mix the solution per the manufacturer’s instructions (e.g., Salt-Away recommends a 10:1 water-to-solution ratio).
- Use a mixing attachment or pour the solution into a flushing bag/bucket.
- Follow the standard flushing procedure.
Cost: A 32 oz. bottle of Salt-Away costs $15-$25 and lasts multiple flushes.
How Long Should You Flush the Motor?
The flushing duration varies by manufacturer and engine size, but most recommend 5-15 minutes to ensure thorough salt removal. Here’s a breakdown:
| Manufacturer | Recommended Flush Time | Notes |
|---|---|---|
| Yamaha | 10-15 minutes | Use flush port or muffs; engine off for port flushing. |
| Mercury | 3-5 minutes | Run at idle; warm engine to open thermostat. |
| Suzuki | 5 minutes | Use flush port or muffs; engine can be off. |
| Honda | 5 minutes | Use flush port or bag; prop must be removed. |
| Evinrude | 5 minutes | Tape auxiliary inlets; water pressure 20-40 psi. |
| Tohatsu/Nissan | 5-10 minutes | Use flush port or muffs; high water pressure. |
Expert Insight: Boaters on forums like The Hull Truth report flushing times of 5-10 minutes, with some extending to 15 minutes for extra caution. A common practice is to taste the tell-tale water to check for salt, stopping when it tastes fresh (though this is not universally recommended due to hygiene concerns).
How Soon Should You Flush? Is 5 Days Too Long?
Flushing immediately after saltwater use is ideal, as it prevents salt from crystallizing and drying inside the cooling passages. Manufacturers and marine experts emphasize flushing before the engine cools and the thermostat closes, as this ensures water reaches all passages. However, the question of whether five days is too long to wait depends on several factors.
The Case for Immediate Flushing
- Salt Crystallization: Saltwater left in the engine can dry and form crystals within hours, especially in hot climates. These crystals can clog cooling passages, leading to overheating or corrosion over time.
- Thermostat Position: Flushing while the engine is warm keeps the thermostat open, allowing water to circulate fully.
- Manufacturer Recommendations: Yamaha, Mercury, and Suzuki recommend flushing after every saltwater use to prevent long-term damage.
The Case for Delayed Flushing
- Real-World Practices: Some boaters, particularly commercial operators like charter captains and lobstermen, report not flushing their engines for days, weeks, or even at all, with engines lasting thousands of hours. This is often attributed to frequent use, which keeps water flowing through the engine, preventing salt from settling.
- Short-Term Tolerance: Many forum users, including those with decades of experience, argue that a delay of five days is unlikely to cause significant damage, especially for a newer engine like a 3-year-old Yamaha 6hp. The corrosion process is gradual, and a single delay may not lead to immediate issues.
Conclusion on Timing
While five days is not catastrophic, it’s not ideal. Salt left in the engine for several days can begin to form deposits, especially if the engine is exposed to heat and air, which accelerate drying. For a small outboard like a 6hp Yamaha used over three days in saltwater, flushing each day is recommended to minimize risk. If daily flushing isn’t feasible (e.g., no freshwater access at the ramp), flushing within a day or two is safer than waiting five days. Carrying a portable flushing kit (muffs or a bucket) and finding a hose at a marina, hotel, or car wash can make this easier.
Practical Tip: For a 3-day saltwater trip, consider flushing daily at the boat ramp or marina if possible. If you must wait until you return home, a 5-day delay is unlikely to cause immediate harm, but flush thoroughly (10-15 minutes) with a salt-dissolving solution like Salt-Away to address any buildup.
Can You Remove Crystallized Salt Without Disassembly?
Crystallized salt in the cooling system can be challenging to remove without taking the engine apart, but it’s not impossible in many cases. Here’s how:
- Extended Flushing: Running fresh water or a salt-dissolving solution like Salt-Away for 15-20 minutes can dissolve minor salt deposits. The high solubility of salt in water aids this process.
- Chemical Solutions: Products like Salt-Away or Rydlyme are designed to break down salt and scale. Mix with water and circulate through the engine using a flushing attachment.
- Professional Cleaning: For severe buildup, a marine mechanic may need to perform a chemical flush or partial disassembly to clean the cooling passages.
Limitations: Heavy crystallization or blockages in narrow passages may require professional intervention. Regular flushing after each use prevents this issue, as salt is easier to remove before it hardens.
Cost: Professional cleaning can cost $100-$500, depending on the engine size and extent of buildup.
Is Flushing Necessary After Freshwater Use?
Flushing is generally unnecessary for outboards used in clean, clear freshwater lakes with minimal silt or sediment. Freshwater lacks the corrosive salts found in saltwater, and clear lake water poses little risk of clogging cooling passages. However, there are exceptions:
- Silty or Muddy Freshwater: If the lake water contains significant sediment, flushing with clean tap water can prevent debris from settling in the cooling system.
- Manufacturer Guidance: Some manufacturers, like Yamaha, recommend flushing after use in silty freshwater, as seen in their early 2000s F225-F250 models, which had issues with sediment buildup.
Conclusion: For a clear, silt-free freshwater lake, flushing is not necessary. If the water is murky or silty, a brief 3-5 minute flush with tap water can help maintain the engine.
Addressing Common Myths and Misconceptions
Myth 1: Flushing Is Unnecessary for Saltwater Outboards
Some boaters, particularly those with older two-stroke engines or commercial operators, claim they never flush their outboards and experience no issues. While older engines with simpler cooling systems may tolerate this, modern four-stroke outboards have narrower, more complex cooling passages that are prone to salt buildup. Regular flushing is a safer practice to ensure long-term reliability.
Myth 2: Saltwater Causes Instant Damage
Saltwater is corrosive, but it doesn’t destroy an engine overnight. A 5-day delay won’t ruin a newer engine, but repeated neglect can lead to cumulative damage over years.
Myth 3: All Flushing Methods Are Equal
Different methods (muffs, flush ports, bags) have unique advantages and limitations. Flush ports are easiest for engine-off flushing, muffs are versatile but require engine operation, and bags are ideal for small engines but require propeller removal. Always consult the owner’s manual for the recommended method.
Practical Tips for Saltwater Boaters
- Carry a Flushing Kit: A set of flush muffs ($10-$20) or a small bucket ($10-$15) is lightweight and ensures you can flush anywhere with a hose.
- Use Quick-Connect Systems: As recommended by a Suzuki dealer, a quick-connect system with shut-off valves simplifies flushing. Total cost: ~$20 for two engines.
- Protect the Trailer: Rinse the trailer with fresh water during flushing to prevent corrosion, which can be as critical as engine maintenance.
- Spray with Silicone: Apply silicone spray to the power trim and steering arm to prevent rust, especially on Mercury outboards with non-stainless components.
- Check the Tell-Tale: Always verify water flow during flushing to ensure the system is working correctly.
Manufacturer-Specific Flushing Guidelines
Here’s a detailed comparison of flushing recommendations for major outboard brands:
| Brand | Flush Method | Duration | Special Notes |
|---|---|---|---|
| Yamaha | Muffs, port, or bag | 10-15 min | Engine off for port; prop off for bag/muffs. |
| Mercury | Muffs or port | 3-5 min | Warm engine; max 45 psi water pressure. |
| Suzuki | Muffs or port | 5 min | Engine can be off; tilt to drain. |
| Honda | Muffs, port, or bag | 5 min | Prop off; tape inlets if low water pressure. |
| Evinrude | Muffs or port | 5 min | Tape auxiliary inlets; 20-40 psi pressure. |
| Tohatsu/Nissan | Muffs, port, or bucket | 5-10 min | High water pressure; prop off for bag. |
The Role of Frequent Use in Saltwater
Commercial boaters, such as lobstermen and charter captains, often report skipping flushes without issues. This is largely due to frequent engine use (thousands of hours annually), which keeps water flowing through the cooling system, reducing the chance for salt to settle and crystallize. For recreational boaters with lower usage (50-100 hours per year), salt has more time to dry and form deposits, making regular flushing more critical.
Flushing on a 3-Day Saltwater Trip
For a 6hp Yamaha outboard used in saltwater over three days, daily flushing is ideal but not always practical. If you have access to a hose at the boat ramp or marina, flush for 5-10 minutes after each use. If freshwater is unavailable, a single thorough flush (10-15 minutes with Salt-Away) upon returning home after five days is sufficient for a newer engine. To minimize risk:
- Flush daily if possible, using muffs or a bucket.
- Carry a portable flushing kit for convenience.
- Use a salt-dissolving solution for the final flush to address any buildup.
The Cost of Neglect vs. Maintenance
Neglecting to flush can lead to costly repairs:
- Cooling System Blockage: $500-$2,000 to repair or replace components.
- Water Pump Impeller Damage: $100-$300 for replacement.
- Engine Overhaul: $2,000-$10,000 for severe corrosion damage.
In contrast, flushing is inexpensive:
- Flush Muffs: $10-$20
- Flushing Bag: $30-$50
- Salt-Away (32 oz.): $15-$25
- Hose and Adapters: $10-$30
Regular flushing is a small investment to avoid major expenses.
Diagram: Flushing Decision Tree
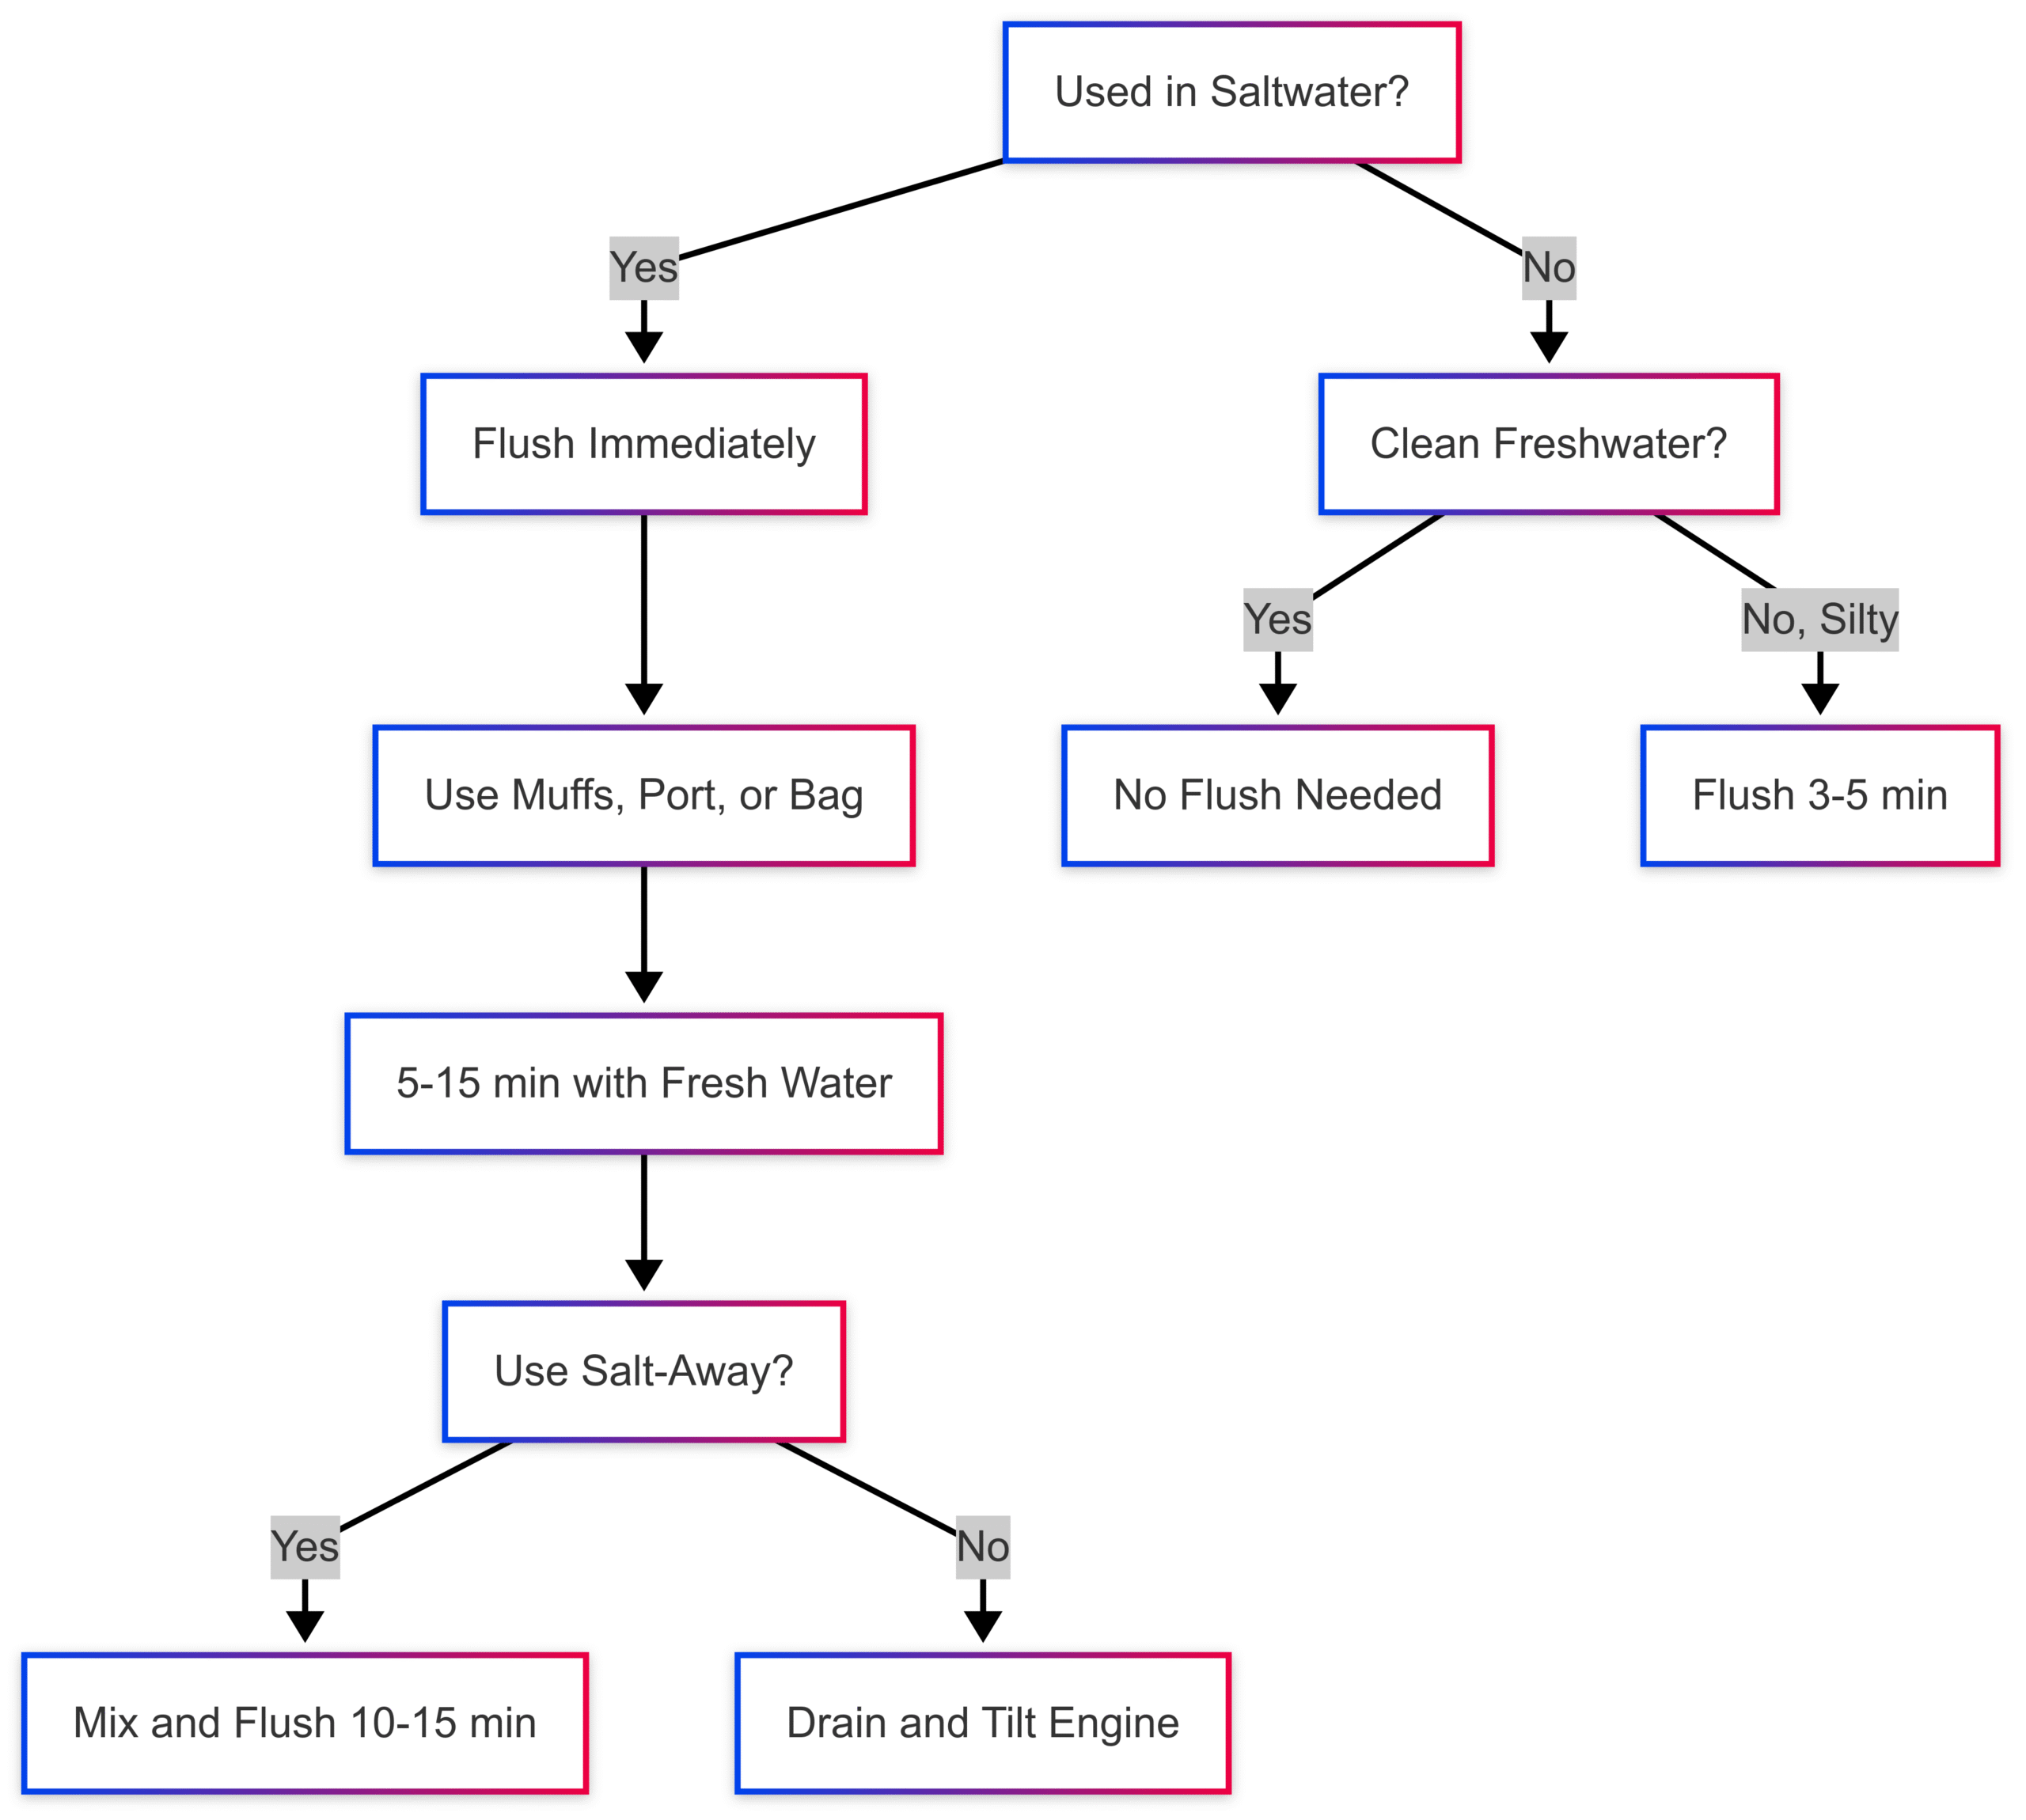
Conclusion
Flushing an outboard motor after saltwater use is a critical maintenance step to prevent corrosion and extend engine life. While a 5-day delay won’t destroy a newer 6hp Yamaha outboard, flushing within a day or two is safer to prevent salt crystallization. Daily flushing during a 3-day saltwater trip is ideal, using flush muffs, a port, or a bag, with a duration of 5-15 minutes depending on the manufacturer. For freshwater use in clear lakes, flushing is typically unnecessary unless the water is silty. By following manufacturer guidelines, using affordable flushing tools, and addressing salt buildup promptly, you can keep your outboard in top condition for years of reliable boating.
Share Is 5 days too long to flush outboard after using it in saltwater? with your friends and Leave a comment below with your thoughts.
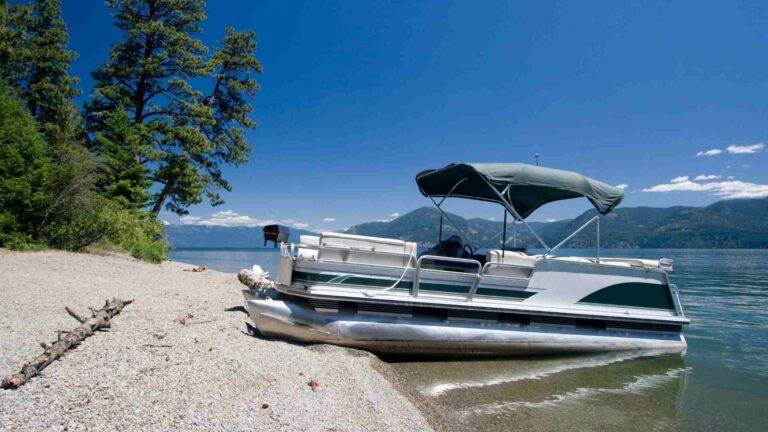
Read Benefits of Using a Bimini Top for Sun Protection on a Boat until we meet in the next article.