How To Wire A Boat | Beginners Guide With Diagrams
Learn how to wire a boat with our comprehensive beginner’s guide. Includes step-by-step instructions, diagrams, safety tips, and product recommendations.
Wiring a boat’s electrical system can seem daunting, but with the right knowledge, tools, and approach, it’s a manageable DIY project that can save you thousands while giving you intimate knowledge of your vessel’s electrical setup. This guide provides a detailed, step-by-step process for wiring a boat’s 12V DC system, focusing on safety, efficiency, and reliability. Whether you’re rewiring a small center console or upgrading a larger vessel, this article covers essential components, tools, techniques, and best practices, complete with diagrams and product recommendations.
Understanding Boat Electrical Systems
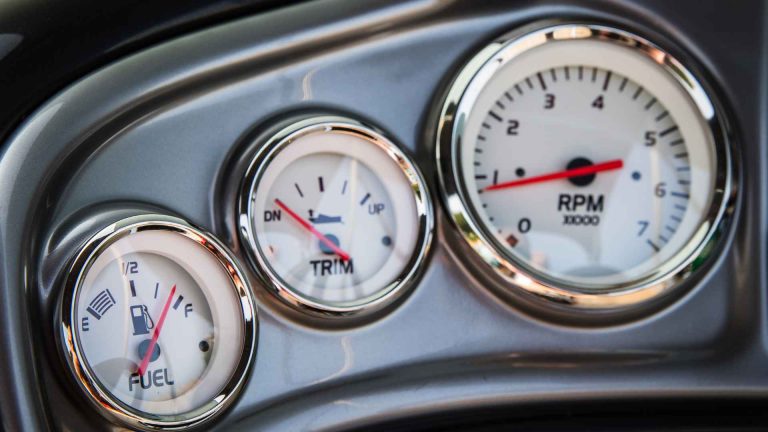
Boat electrical systems are primarily 12V DC (direct current), powered by batteries and charged by an engine’s alternator or auxiliary charger. Unlike household AC systems, DC systems are simpler but require careful attention to safety and proper component selection due to the marine environment’s harsh conditions—moisture, vibration, and corrosion. The electrical panel, often called the distribution panel, serves as the central hub, managing power distribution to systems like navigation lights, bilge pumps, GPS, and other accessories.
Key Components of a Boat’s Electrical System
- Batteries: The power source, typically a starting battery for high-current engine cranking or a deep-cycle battery for sustained loads like electronics.
- Battery Switch: A marine-grade switch to control power flow, isolate batteries, or combine them in emergencies.
- Circuit Breakers and Fuses: Protect circuits from overloads and short circuits.
- Bus Bars: Distribute power to multiple circuits, acting as a central connection point.
- Wiring: Marine-grade, tinned wire to resist corrosion, with standardized colors (red for positive, black or yellow for negative).
- Switch Panel: Controls individual circuits, often with built-in breakers.
- Terminal Blocks: Breakout points for organized wiring and troubleshooting.
- Multimeter: Essential for testing voltage and continuity.
Safety First
Working with electricity, especially in a marine environment, demands caution:
- Disconnect Power: Always disconnect shore power before working on AC systems and turn off the battery switch for DC work.
- Use Marine-Grade Components: Tinned wire and corrosion-resistant connectors are critical to prevent failures.
- Avoid Short Circuits: Ensure proper insulation and secure connections to prevent fires or equipment damage.
- Know Your System: Familiarize yourself with your boat’s wiring diagram and component layout.
Step-by-Step Guide to Wiring a Boat
Step 1: Plan Your Electrical System
Before touching a wire, plan your system meticulously. A well-thought-out plan reduces errors, ensures safety, and simplifies troubleshooting.
- Assess Your Needs: List all electrical loads (e.g., navigation lights, bilge pump, GPS, aerator). Determine each device’s amperage and wire run length to select appropriate wire gauges.
- Draw a Wiring Diagram: Sketch a diagram showing batteries, switches, panels, and loads. This serves as your roadmap. For example, a typical small boat might have one starting battery, one house battery, and circuits for navigation lights, bilge pump, and GPS.
- Choose Components: Select marine-grade components. Below is a table of recommended products with approximate prices.
| Component | Example Product | Price (USD) | Purpose |
|---|---|---|---|
| Battery Switch | Blue Sea 3000 HD ON-OFF | $89.00 | Isolates or combines batteries |
| Battery Switch (Basic) | Blue Sea 6006200 ON-OFF | $35.00 | Basic battery isolation |
| Recessed Battery Switch Mount | RigPro X100 | $30.00–$87.50 | Mounts battery switch securely |
| Screw Terminal Breaker | Generic Screw Terminal Breaker | $5.00 | Protects individual circuits |
| Fuse Block | Blue Sea 5026 Fuse Block | $40.00 | Distributes power to multiple circuits |
| Negative Bus Bar | Blue Sea 2300 | $20.00 | Central point for negative connections |
| Duplex Boat Cable (6-10 AWG) | Generic 6 AWG, 20 ft | $70.00 | Power from battery to panel |
| Duplex Boat Cable (12-16 AWG) | Generic 14 AWG, 250 ft | $125.00 | Power to individual loads |
| Heat Shrink Connectors (Assorted) | Generic Butt Splice/Ring/Spade | $20.00–$100.00 | Secure, waterproof connections |
- Tools Needed:
- Ratcheting crimper (e.g., Ancor Ratcheting Crimper, $70)
- Wire stripper (e.g., Klein Auto Wire Stripper, $25)
- Fish tape (e.g., Klein Fish Tape, $15)
- Heat gun ($20)
- Dielectric grease ($5)
- Liquid electrical tape ($5)
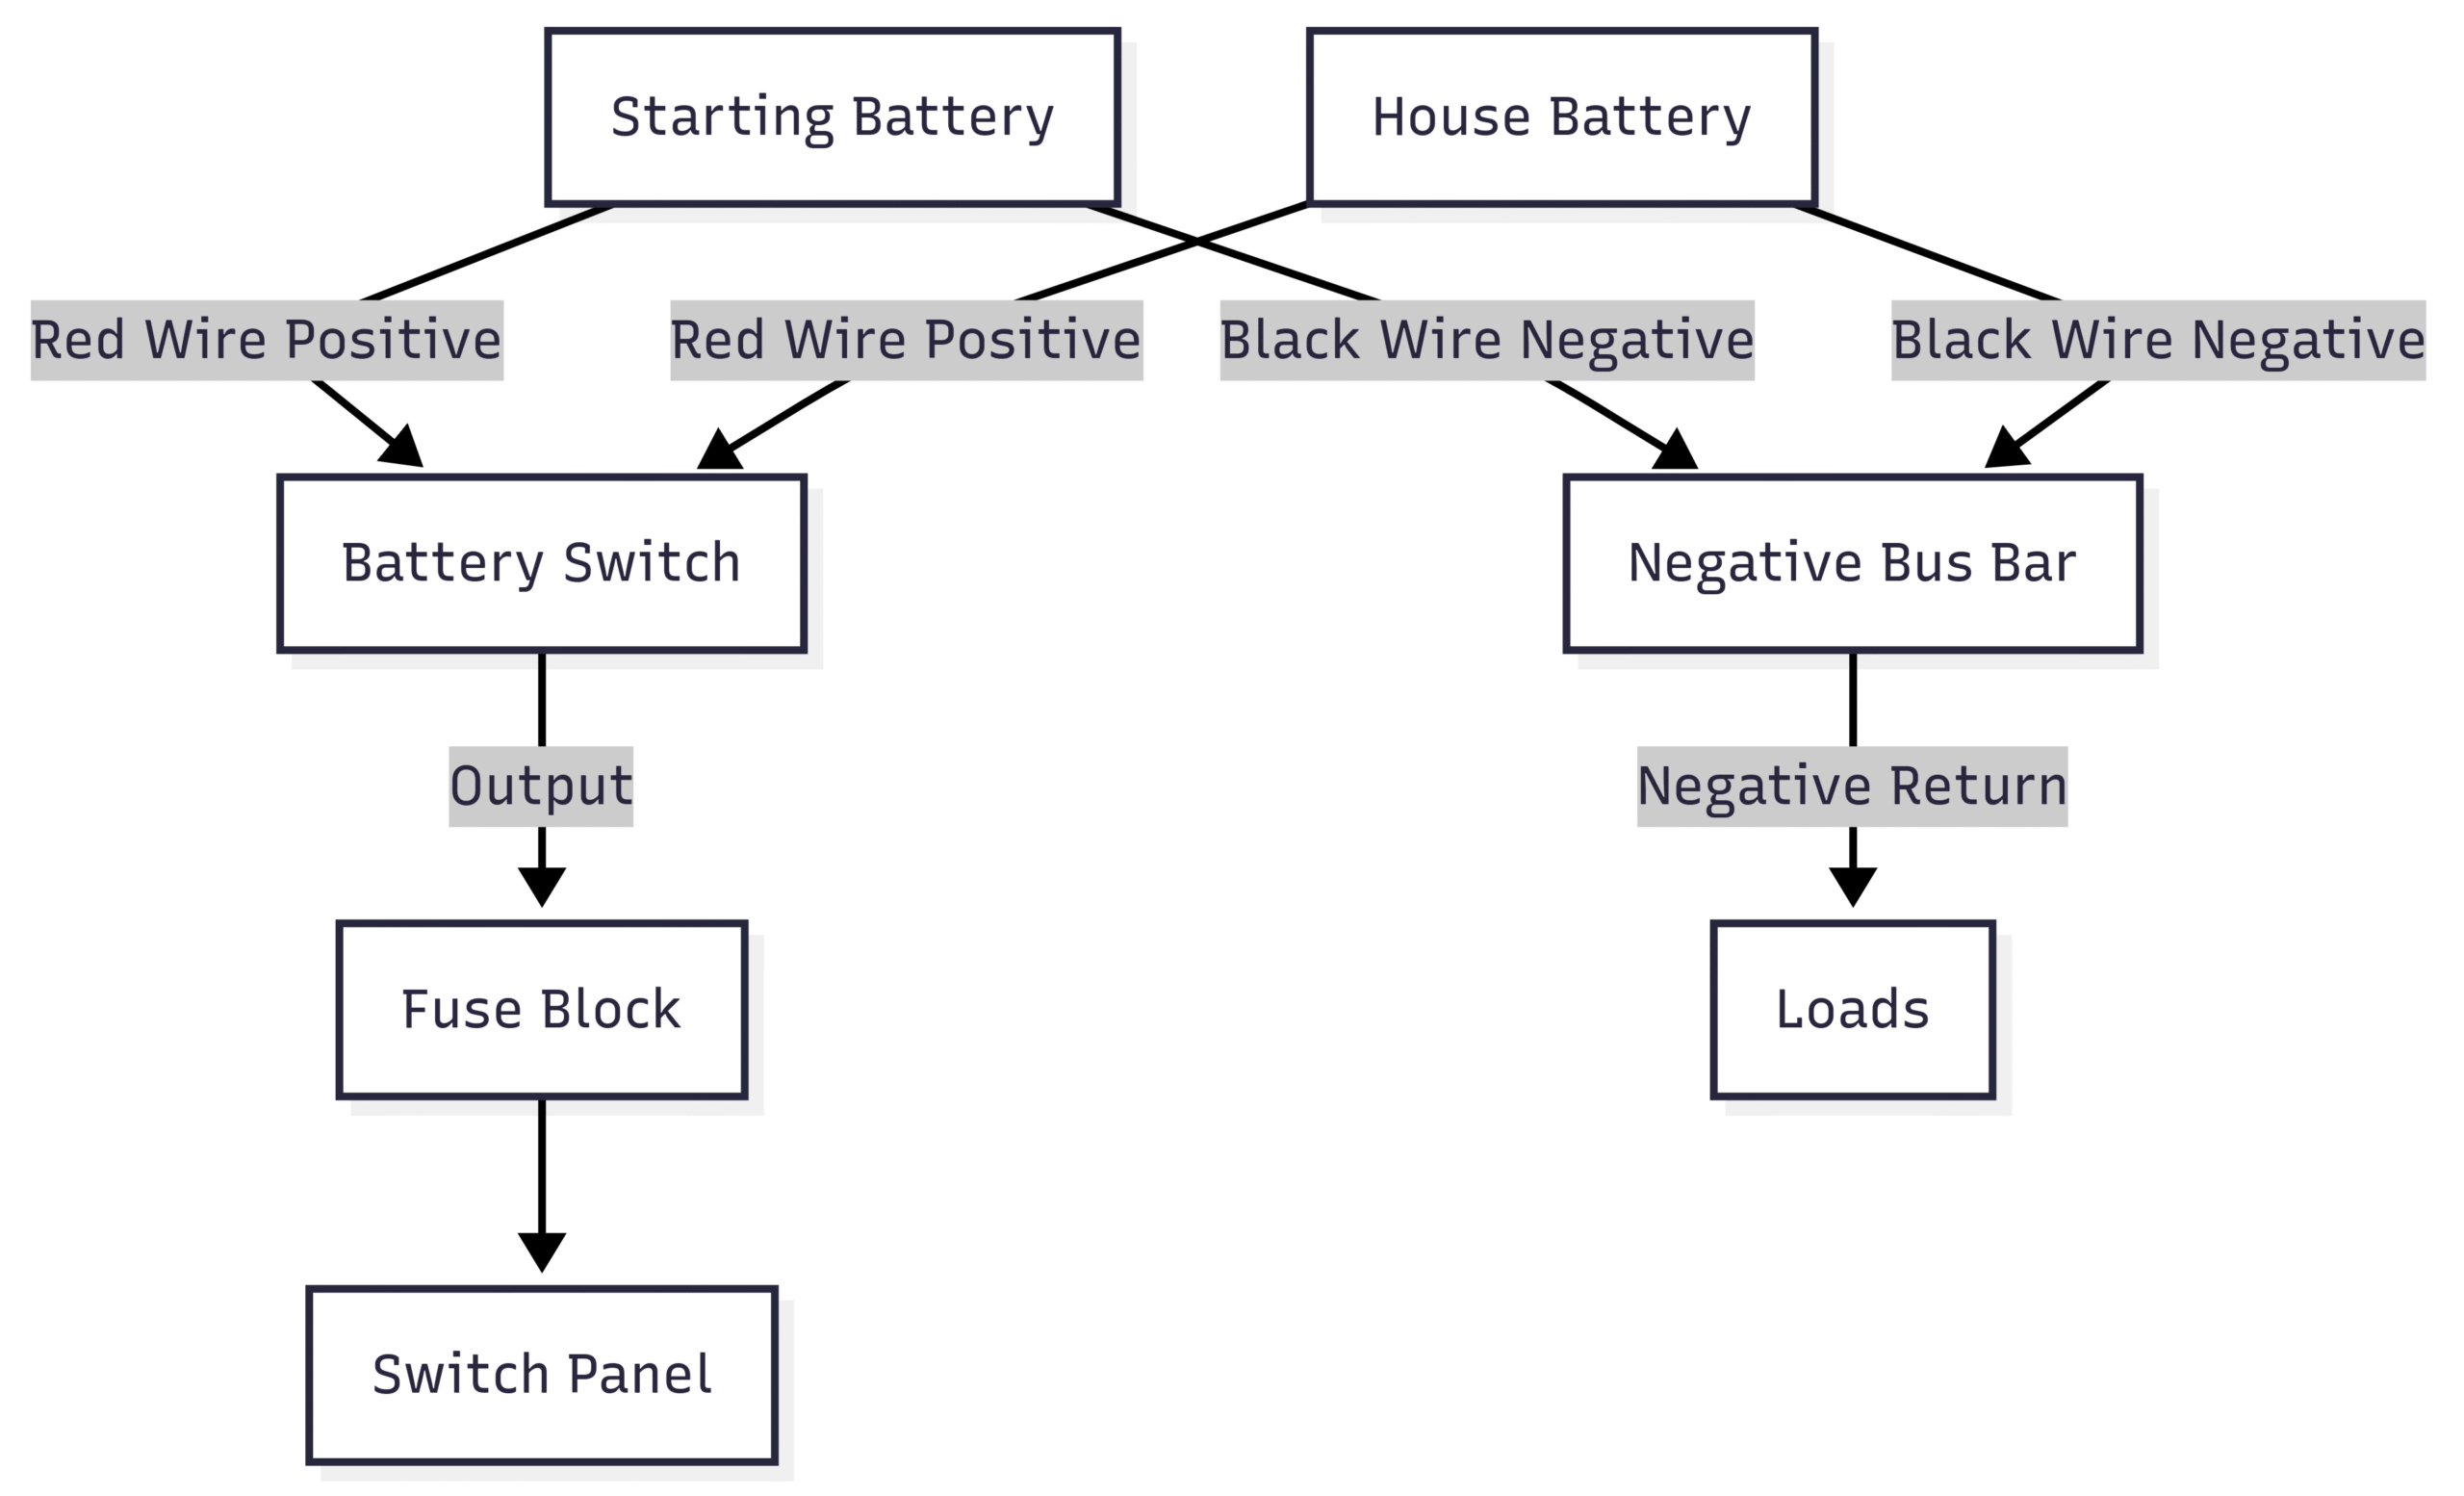
Step 2: Install the Battery and Battery Switch
The battery is the heart of your electrical system. Most small boats use one starting battery and one deep-cycle house battery, while twin-engine setups may have two starting batteries and one house battery.
- Battery Selection:
- Starting Battery: High current capacity (e.g., 800A) for engine starting.
- Deep-Cycle Battery: 70–80 AH capacity for sustained loads.
- Battery Switch Installation:
- Install a marine-grade battery switch (e.g., Blue Sea 5511e, $125 with ACR for automatic charging relay).
- Connect both battery positives to the switch’s input terminals.
- Use a 1-2-BOTH switch to select between batteries or combine them for emergency starting.
- Ensure all non-engine circuits are protected with fuses or breakers.
Diagram: Battery and Switch Setup
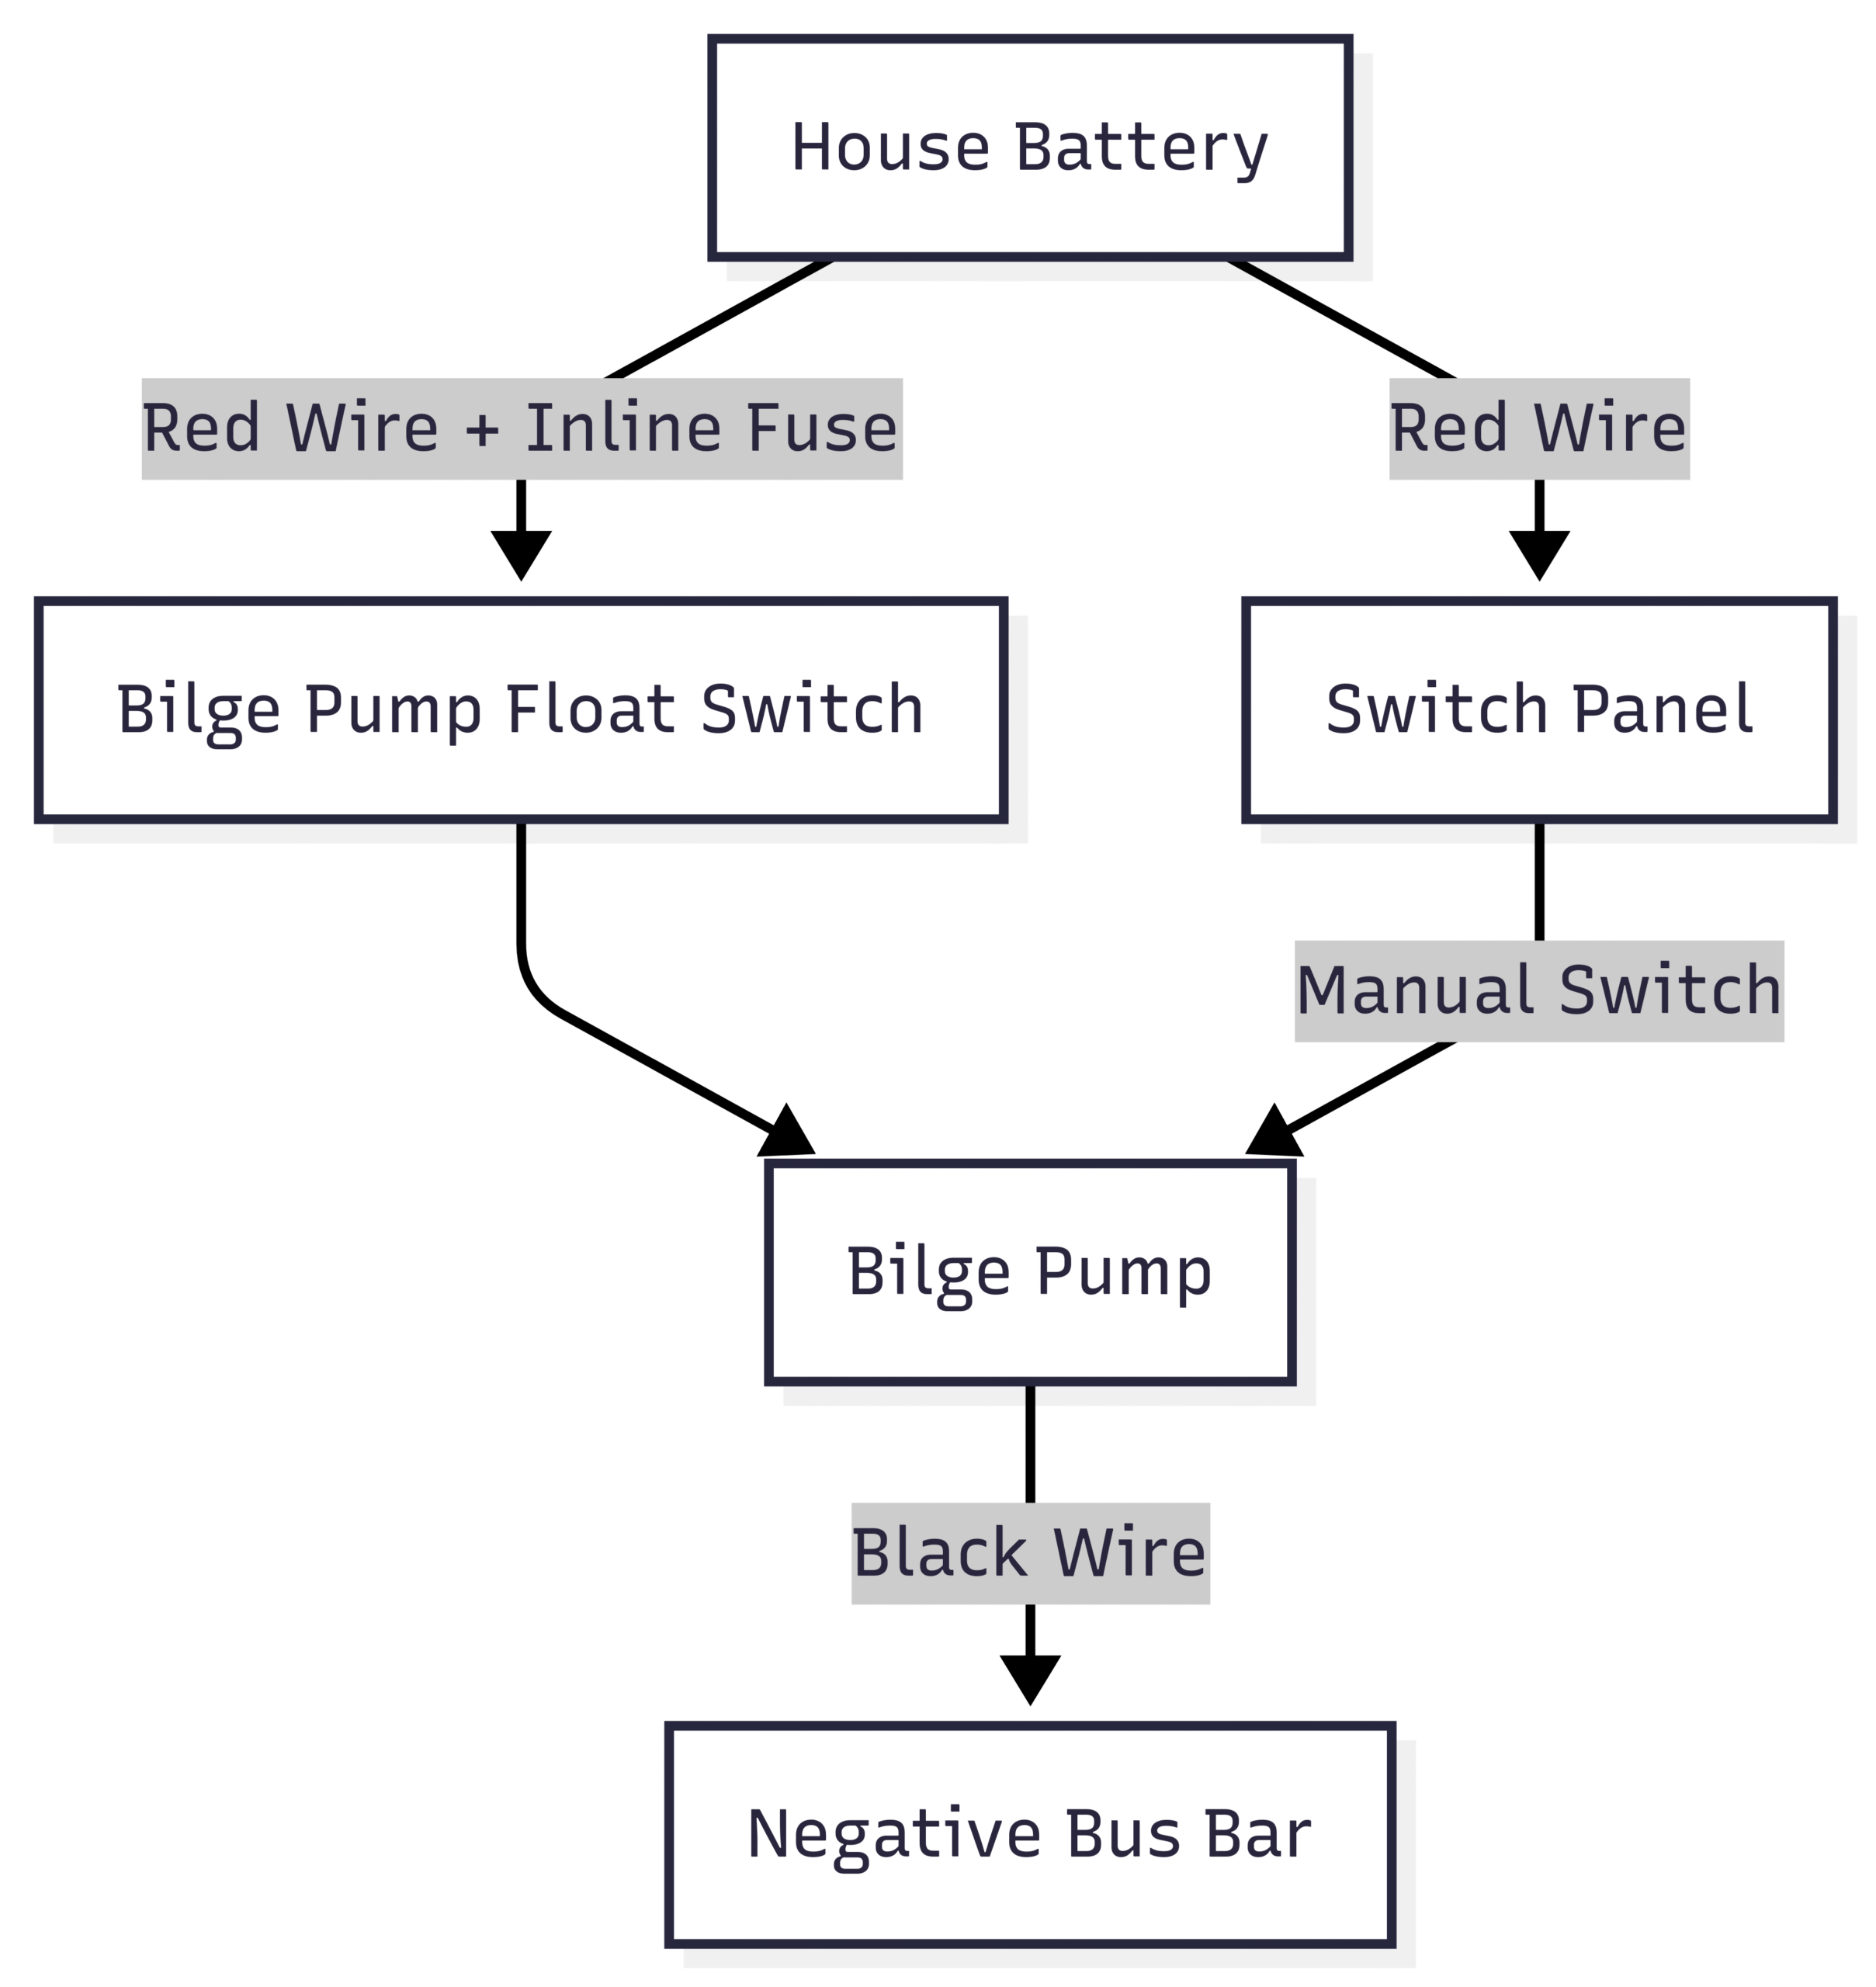
Step 3: Bypass Critical Loads
Certain systems, like the bilge pump, should remain operational even when the battery switch is off. This ensures safety, as a bilge pump can prevent flooding.
- Bilge Pump Wiring:
- Connect the bilge pump’s positive wire to the battery via an inline fuse (e.g., 10A for a typical pump).
- Run the negative wire to the negative bus bar.
- Wire the bilge pump in parallel with a manual switch on the panel for override control.
- Other Bypassed Loads: Stereo memory lines may also bypass the switch.
Diagram: Bilge Pump Bypass
Step 4: Route Power to the Switch Panel
The switch panel distributes power to individual circuits. Run heavy-gauge cables (e.g., 6–10 AWG) from the battery switch to the panel to minimize voltage drop.
- Cable Sizing:
- Small boats (3–5 loads): 12 AWG minimum.
- Larger boats (5–10 loads): 10 AWG.
- Over 30 ft boats: 8 AWG for long runs.
- Connection:
- Positive cable from battery switch to panel’s main input (with a fuse).
- Negative cable to a negative bus bar.
- Use a switch panel with built-in circuit breakers for simplicity.
Step 5: Install a Terminal Block
A terminal block organizes wiring from the switch panel to individual loads, making troubleshooting and future modifications easier.
- Setup:
- Connect each switch output to a dedicated terminal on the block.
- Use heat-shrink labels for identification.
- Crimp #8 ring terminals on load wires and connect to the terminal block.
- Example: A bilge pump’s manual switch output connects to the terminal block in parallel with the float switch.
Step 6: Connect Loads to the Terminal Block and Bus Bar
Run wires from the terminal block to each load (e.g., navigation lights, GPS). Connect negatives to the bus bar.
- Wiring Tips:
- Use tinned, marine-grade wire (e.g., 14 AWG for most loads).
- Secure connections with heat-shrink ring terminals and dielectric grease.
- Label both ends of each wire for easy identification.
- Use zip ties or adhesive mounts to secure wiring, avoiding sharp edges.
Step 7: Test and Troubleshoot
After wiring, test the system thoroughly:
- Use a Multimeter:
- Check voltage at each circuit (should be ~12.6V for a fully charged battery).
- Test continuity to ensure proper connections.
- Troubleshooting Steps:
- Identify the problem circuit.
- Check if the breaker has tripped or fuse has blown.
- Verify connections at the terminal block and bus bar.
- Consult your wiring diagram to trace issues.
Best Practices for Boat Wiring
- Use Tinned Wire: Prevents corrosion in the marine environment.
- Avoid Soldering: Crimping with adhesive heat-shrink connectors is preferred due to vibration resistance (per ABYC standards).
- Label Everything: Use waterproof labels or clear heat-shrink tubing with printed labels.
- Plan for Expansion: Leave extra wire length and terminal block space for future additions.
- Minimize Voltage Drop: Use appropriately sized wires for run length and load.
- Secure Wiring: Use zip ties, drip loops, and conduit to protect wires from abrasion and water.
Common Challenges and Solutions
| Challenge | Solution |
|---|---|
| Voltage Drop | Use larger-gauge wire or shorten runs. |
| Corrosion | Use tinned wire, heat-shrink connectors, and dielectric grease. |
| Disorganized Wiring | Label wires, use terminal blocks, and create a detailed wiring diagram. |
| Physical Strain | Use fish tape to pull wires and plan accessible routes to avoid “boat yoga.” |
DIY vs. Professional Installation
Rewiring a boat yourself can save significant costs—quotes for professional rewiring can range from $1,000 to $2,000 for a small boat. However, it requires time, planning, and basic electrical knowledge. As forum user Fordy noted, “You can’t put a price on knowing every wire in your boat.” DIY wiring offers peace of mind and customization but demands careful execution. If you’re unsure, consult a marine electrician for complex setups.
Recommended Resources
- Books: “The 12 Volt Bible for Boats” by Miner Brotherton and “Boatowner’s Mechanical and Electrical Manual” by Nigel Calder.
- Suppliers: GenuineDealz, Pacer, and Amazon for marine-grade wire and connectors.
- Online Forums: The Hull Truth for community advice and wiring threads.
Conclusion
Wiring a boat is a rewarding project that enhances your understanding of your vessel’s electrical system while ensuring safety and reliability. By following this guide, using quality components, and adhering to best practices, you can create a robust electrical setup tailored to your needs. Start with a clear plan, invest in the right tools, and take your time to do it right. Your boat—and your wallet—will thank you.
Happy Boating!
Share How To Wire A Boat | Beginners Guide With Diagrams with your friends and leave a comment below with your thoughts.
Read Boat Cover Tie Down Straps: Keeping Your Boat Safe Guide until we meet in the next article.