How we painted our Pontoon Boat!
Discover my journey of painting a pontoon boat’s aluminum sides, with step-by-step prep, paint tips, and wrap options for a stunning DIY transformation.
The sun glinted off the aluminum sides of my pontoon boat, its faded off-white panels screaming for a refresh. I’d been dreaming of this project since the day I bought my 2018 Tahoe LTZ Elite, a sturdy vessel powered by a 175 Mercury Verado with sea legs. The boat was a beauty, but years of lake adventures had left it looking tired. Stripped of its old decals, the aluminum fencing was a blank canvas, and I was ready to make it my own. This is the story of how I tackled a DIY pontoon painting project, the lessons I learned, and the vibrant result that turned heads on the water.
The Spark of Inspiration
My pontoon is more than a boat—it’s a floating sanctuary for family fishing trips, tubing with the kids, and lazy summer days on the lake. But its lackluster appearance didn’t match the memories we were making. I wanted a bold, dark color to contrast the polished aluminum rails and give it a sleek, modern edge. After browsing forums like pontoonforums.com, I saw others transforming their boats with paint or vinyl wraps. One user, Liquid Asset, shared stunning photos of their black-painted pontoons, and I was hooked. Their success fueled my confidence, but I needed to decide: paint or wrap?
Exploring Options: Paint vs. Wrap
Before diving in, I researched both painting and wrapping. Painting promised a durable, custom finish but required meticulous prep and skill. Wrapping, suggested by forum members like TomS and kaydano, offered vibrant designs and easier application but came with a higher price tag—around $2,000-$3,000 for a professional job, according to MrG. I considered a DIY solid-color wrap, as kaydano mentioned, but the cost of materials and the learning curve pushed me toward painting. I wanted the satisfaction of doing it myself and keeping costs low.
Comparison Table: Paint vs. Wrap for Pontoon Fencing
| Aspect | Painting | Vinyl Wrap |
|---|---|---|
| Cost | $100-$300 (DIY materials) | $500-$3,000 (DIY or professional) |
| Durability | 5-10 years with proper prep | 3-7 years, depending on quality |
| Application Time | 2-4 days (DIY) | 1-2 days (DIY or professional) |
| Skill Level | Moderate (requires prep and technique) | Moderate to high (precision for wraps) |
| Customization | Limited to paint colors, decals added | Endless designs and patterns |
| Maintenance | Easy to clean, may need touch-ups | Resistant to heat, may peel over time |
The Game Plan: Preparing for the Project
I knew prep was everything. Forum user mattb emphasized, “If you want a good finish, you need a good start.” My pontoon’s aluminum panels were oxidized, with some decal residue and minor dings. I decided to paint only the side panels, leaving the polished rails untouched for contrast, as MrG advised against painting rails due to wear.
Tools and Materials
I gathered my supplies, guided by Liquid Asset’s detailed process and Flysmallie’s advice on using epoxy primer. Here’s what I used:
- Rust-Oleum Marine Topside Paint (Black, $25/quart, 2 quarts needed)
- Rust-Oleum Marine Aluminum Primer ($20/quart, 1 quart)
- Enamel Hardener ($15, enhances durability and gloss)
- Paint Thinner ($10, for smoother application)
- 3M Sandpaper (80-2000 grit, $15/pack)
- Pressure Washer (borrowed, ~$300 if purchased)
- Painter’s Tape and Tarps ($20)
- Foam Rollers and Brushes ($15)
- Rubber Mallet and Trowel ($25)
- Safety Gear (goggles, mask, gloves, $20)
- Cleaning Supplies (vinegar, rags, $10)
Total Cost (DIY): ~$140 (excluding borrowed tools)
Workspace Setup
I set up in my spacious garage, ensuring good ventilation and lighting. A shop light helped me spot imperfections, and tarps protected the floor from overspray. I avoided painting outdoors due to dust and weather risks, as mattb warned about inconsistent results in open spaces.
Step-by-Step: The Painting Process
Here’s how I transformed my pontoon, step by step, inspired by Liquid Asset’s method and forum tips.
Step 1: Assessing the Boat
First, I inspected the pontoon for structural issues. The tubes and seals were solid, so I focused on the fencing. The aluminum panels, attached with screws and tabs, had minor dents and oxidation but no corrosion. I removed the bench seats (secured with screws) to access the panels fully, as outlined in the article.
Step 2: Cleaning and Prepping
I pressure-washed the panels to remove dirt and decal residue, then scrubbed with vinegar and water for a clean surface. Using 80-grit sandpaper, I scuffed the aluminum to remove oxidation and old paint, ensuring a smooth base. Flysmallie’s advice to clean thoroughly was spot-on—any residue could ruin adhesion.
For dents, I used a rubber mallet on a flat surface to gently smooth them out. Some curved corner panels required a friend’s help to remove without bending the tabs. I sanded again with 120-grit to refine the surface, cleaning after each round.
Step 3: Priming the Panels
I applied Rust-Oleum Marine Aluminum Primer with a foam roller, thinning it slightly for better flow. The primer, recommended by BarlettaTritoon for its epoxy-like adhesion, created a uniform base. I worked on one panel at a time, removing them from the frame to avoid overspray on the rails. Each panel dried for 4 hours before flipping to prime the other side.
Step 4: Painting
Using Rust-Oleum Marine Topside Paint in black, mixed with enamel hardener, I rolled on the first coat. The hardener, as Liquid Asset noted, boosted durability and added gloss. I thinned the paint slightly to prevent streaks, applying two coats per side, sanding lightly with 400-grit between coats for smoothness. Each coat dried for 6 hours in my well-ventilated garage.
Step 5: Reassembly
Once dry, I reattached the panels to the frame, securing screws and flattening tabs carefully with a trowel. The gate panels, which see more wear, got extra attention to ensure tight fittings. I reinstalled the seats, cleaning the deck underneath for a polished look.
Step 6: Final Touches
I added custom vinyl decals ($50) for a personalized touch, matching the boat’s new vibe. Unlike tcpip95’s domed numbers, I opted for simple, flat decals for cost savings. The black paint against the polished rails was striking, just as Liquid Asset described.
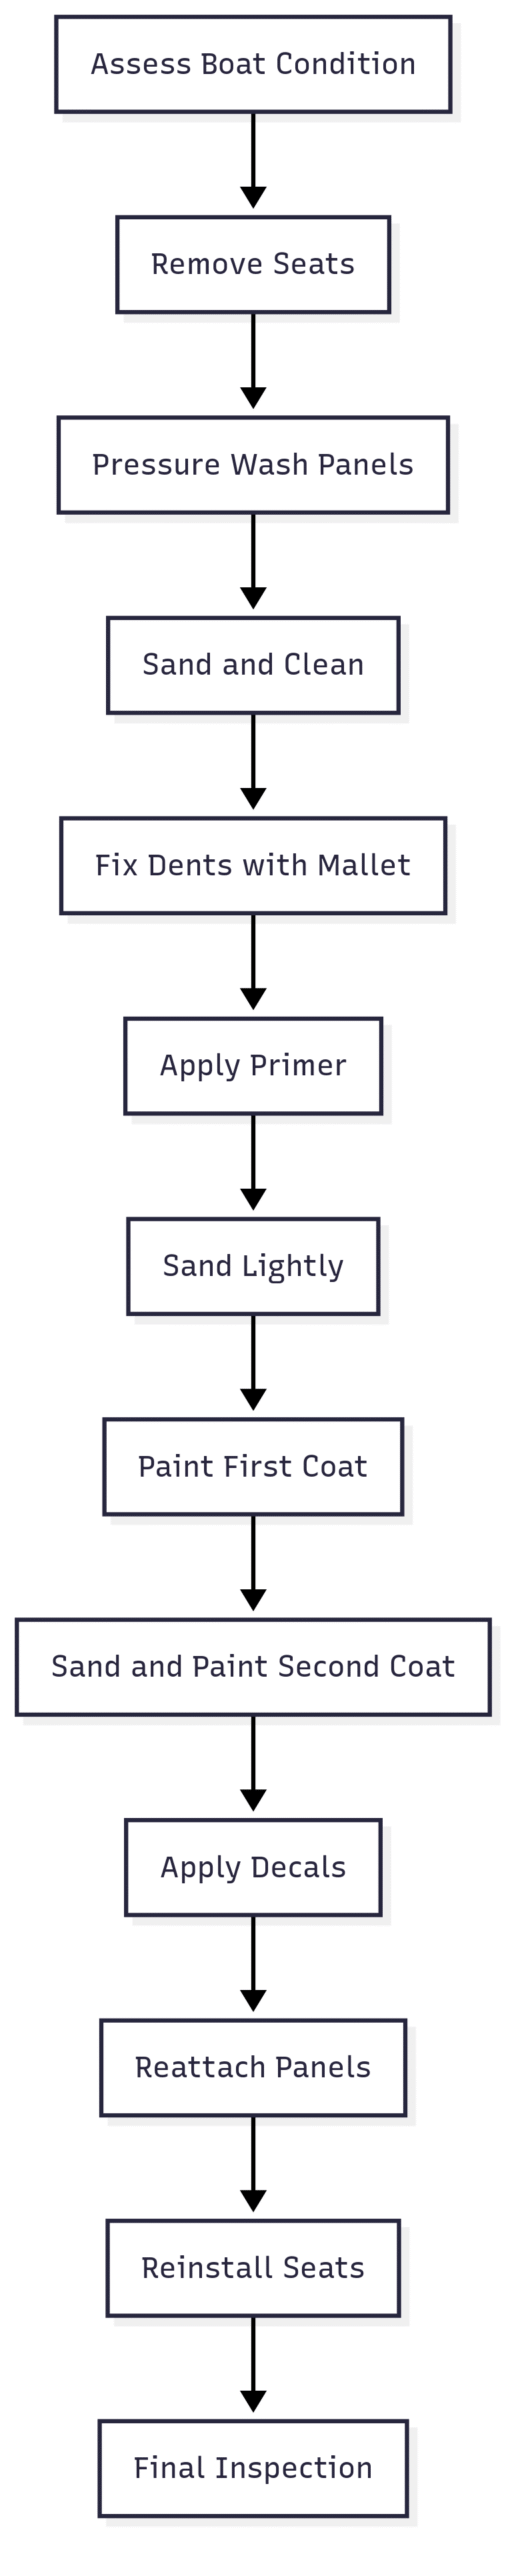
Chart: Painting Process Workflow
Challenges and Lessons Learned
The process wasn’t without hiccups. Sanding was tedious, and I underestimated how long it would take—nearly two days for all panels. One panel had a stubborn dent that required extra mallet work, testing my patience. I also learned to double-check my primer coverage; a missed spot showed through the paint, requiring a touch-up.
Liquid Asset’s warning about avoiding a show-car finish saved me from perfectionism. I aimed for a clean, durable look, not a mirror shine, which kept the project manageable. Their 9-year durability claim gave me confidence, though I’ll monitor for chips, especially at the nose cones, despite my sea legs reducing beaching risks.
The Result: A Head-Turning Pontoon
When I finally launched the boat, the transformation was jaw-dropping. The black panels gleamed under the sun, earning compliments at the ramp, much like bansil’s “mean and sexy” description of Liquid Asset’s boat. My top speed hit 37 MPH, slightly limited by the boat’s weight and sea legs, but a new prop could push it to 40 MPH, as Liquid Asset suggested.
Cleaning is now a breeze—vinegar and water keep the panels spotless, as Liquid Asset recommended. The paint has held up through several lake trips, with no peeling or chipping, proving the Rust-Oleum Marine system’s reliability.
Alternatives Considered
I briefly revisited wraps after kaydano’s DIY solid-color suggestion. A basic vinyl wrap kit costs $500-$800, but applying it to curved panels seemed daunting. Professional wraps, while stunning, were out of my budget. Automotive paint shops, as the moderator suggested, quoted $1,500-$2,000, but I valued the DIY experience and cost savings.
Advice for Fellow DIYers
If you’re considering painting your pontoon, here’s my advice:
- Prep is King: Spend extra time cleaning and sanding. A smooth surface ensures paint adhesion.
- Use Marine Paint: Rust-Oleum’s marine line is affordable and durable for water exposure.
- Test on a Small Area: Practice on a scrap piece to perfect your rolling technique.
- Enlist Help: A friend makes removing and reinstalling panels easier, especially for curved sections.
- Consider Your Goals: If you want complex designs, a wrap might be worth the investment.
The Joy of a Revived Pontoon
Painting my pontoon was a labor of love, transforming a faded boat into a sleek, personalized vessel. The $140 investment and four days of work delivered a result that rivals professional jobs. Every time I cruise the lake, the black panels and gleaming rails remind me of the effort and the community wisdom that guided me. Whether you choose paint or a wrap, the key is to dive in with a plan and embrace the process. My pontoon is ready for more adventures, and I’m already dreaming of the next upgrade.
Happy Boating!
Share How we painted our Pontoon Boat! with your friends and leave a comment below with your thoughts.
Read Finding the Sweet Spot: Motor Height on Your Pontoon Boat until we meet in the next article.