Painting a Fiberglass Boat – A Simple Guide
Learn how to paint a fiberglass boat with our detailed guide. Follow 10 easy steps for a professional finish, including prep, priming, and painting tips.
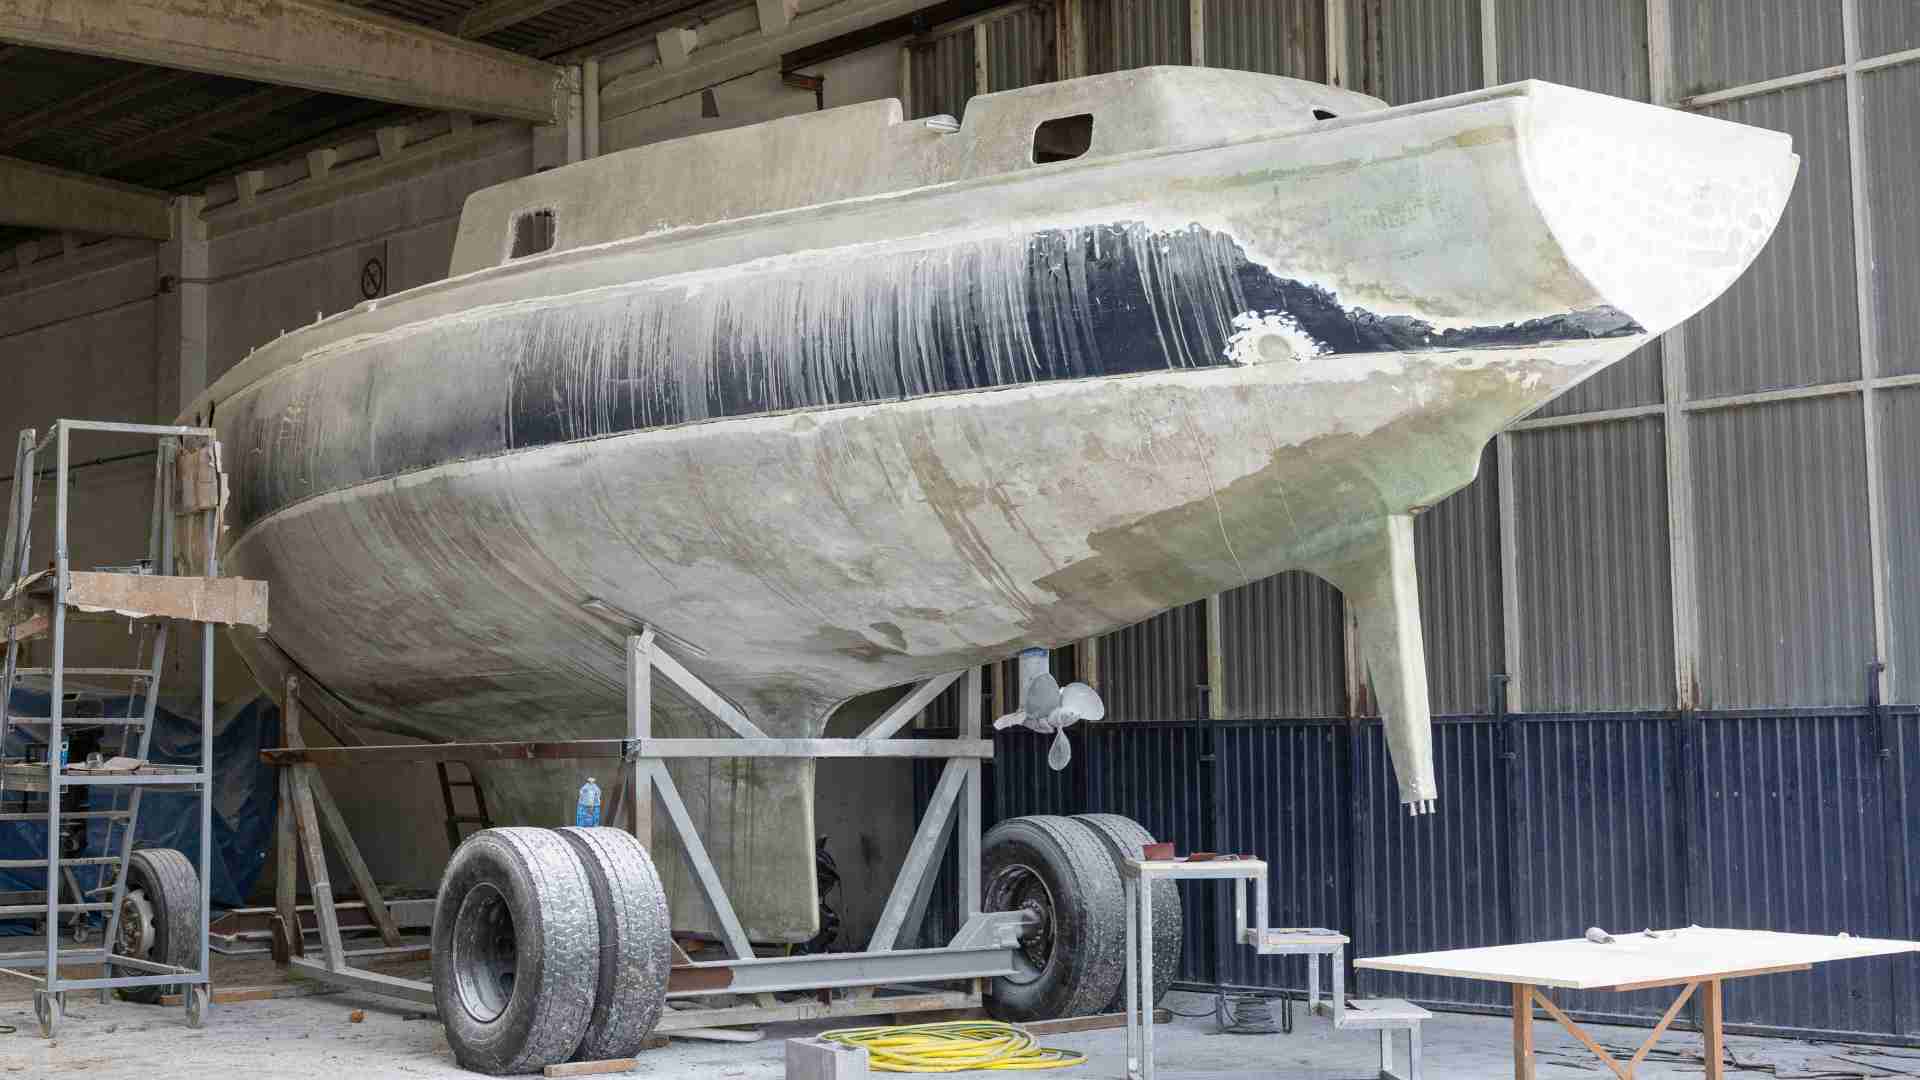
Painting a fiberglass boat can transform its appearance, protect its hull, and extend its lifespan. Fiberglass is a durable material ideal for boats, but its gelcoat can fade or oxidize over time, requiring a fresh paint job to restore its shine. This guide provides a step-by-step process for painting a fiberglass boat, focusing on preparation, application, and maintenance. Whether you’re a DIY enthusiast or a boat owner looking to save on professional costs, this article covers everything you need to know to achieve a professional-quality finish on a 23-foot trailer boat or similar vessel.
Why Paint a Fiberglass Boat?
Fiberglass boats are built to last, often outliving their original gelcoat finish. Exposure to sun, saltwater, and environmental factors can cause the gelcoat to oxidize, leaving a chalky residue when touched. Painting not only enhances the boat’s aesthetics but also protects the hull from UV damage and minor abrasions. A well-executed paint job can last for years, improving resale value and ensuring your boat looks its best on the water.
Understanding Fiberglass Boat Paints
Choosing the right paint is critical for a durable, glossy finish. Here’s a breakdown of the main paint types for fiberglass boats:
- One-Part Polyurethane: Easy to apply, cost-effective, and suitable for DIYers. It provides a decent gloss but may not last as long as two-part options.
- Two-Part Polyurethane: Offers a harder, more durable finish with superior gloss retention. Requires precise mixing and often spraying, making it more complex but longer-lasting.
- Enamels: Affordable and easy to brush on, but less glossy and durable. Typically used for interiors or wooden boats.
- Acrylic Urethane: Provides a high-gloss, professional finish but requires specific application conditions, often left to professionals.
- Antifouling Paint: Used below the waterline to prevent marine growth. Available in hard (non-sloughing) or ablative (self-wearing) formulations, depending on boat usage.
For a 23-foot trailer boat, one-part or two-part polyurethane is recommended for the hull above the waterline, while antifouling paint is essential for the bottom if the boat is stored in water.
Paint Selection Considerations
| Paint Type | Pros | Cons | Best Use | Approx. Cost (Gallon) |
|---|---|---|---|---|
| One-Part Polyurethane | Easy to apply, affordable | Less durable, shorter gloss life | DIY hull painting | $50–$100 |
| Two-Part Polyurethane | Durable, high gloss, long-lasting | Complex mixing, may need spraying | Professional or advanced DIY | $150–$200 |
| Enamel | Easy to brush, low cost | Less glossy, less durable | Interiors, wooden boats | $30–$60 |
| Acrylic Urethane | Superior gloss, professional look | Difficult application, costly | Professional hull painting | $200–$300 |
| Antifouling (Hard/Ablative) | Prevents marine growth | Location-specific efficacy | Bottom of boats in wet slips | $100–$250 |
Note: Prices are approximate and may vary based on brand and region. Always check manufacturer specifications for compatibility with fiberglass.
Tools and Materials Needed
To paint a 23-foot fiberglass boat, gather the following materials:
- Cleaning Supplies: Wax and grease remover (e.g., Awlgrip Awl Prep, $35/gallon), dish soap, clean rags, nitrile gloves ($8/box).
- Repair Materials: Marine-grade fairing compound (e.g., Interlux Interfair, $40/quart), marine epoxy ($30/quart).
- Sanding Supplies: 120-, 180-, 320-, 400-, 800-grit sandpaper ($18–$28/sleeve), random-orbit sander ($50–$100), shop vacuum for dust control.
- Masking Supplies: High-quality painter’s tape (3M Blue, $8/roll), masking paper or plastic sheeting ($50 for 20×200 ft).
- Priming and Painting: Marine primer (e.g., Awlgrip 545 Epoxy Primer, $110/gallon), topcoat paint (e.g., Awlgrip Top Coat, $170/gallon), reducer ($60/gallon), converter ($170/half-gallon), foam rollers ($3.50 each), 2.5” paint brush ($8), roller tray ($3.50), mixing buckets ($1.50 each).
- Finishing: Marine wax (e.g., Life Wax, $20/quart), 1000- and 2000-grit buffing compound ($50–$55/gallon).
- Safety Gear: Full-face respirator ($30), Tyvek suit ($10), safety glasses, sanding mask.
Estimated Total Cost for Materials: $900–$1,200 for a 23-foot boat, depending on paint brand and quantity.
Step-by-Step Guide to Painting a Fiberglass Boat
Below is a detailed, 10-step process to paint your fiberglass boat, with an emphasis on preparation and application techniques for a professional finish.
Step 1: Prepare the Surface
Proper preparation is the foundation of a lasting paint job. Fiberglass boats often have a wax layer over the gelcoat, which must be removed to ensure paint adhesion.
- Clean: Wash the hull with dish soap and water using a scouring pad to remove dirt and loose contaminants. Rinse thoroughly and let it air dry.
- De-wax: Use a wax and grease remover like Awlgrip Awl Prep or Dupont Prep-sol. Apply with one rag and wipe dry with a clean rag before the solvent evaporates. Repeat 2–3 times, changing rags frequently to avoid reapplying wax.
- Sand: Sand the entire surface with 180-grit sandpaper using a random-orbit sander to remove oxidation and create a rough surface for primer adhesion. For severely oxidized gelcoat, start with 120-grit but avoid removing the gelcoat entirely. Vacuum sanding dust to keep the workspace clean.
Tip: Test for wax residue by wiping with a clean rag and solvent. If the rag shows residue, repeat de-waxing.
Step 2: Repair Damage
Inspect the hull for cracks, dents, or gouges. These imperfections must be filled to achieve a smooth surface.
- Fill Imperfections: Use a marine-grade fairing compound (e.g., Interlux Interfair) for minor damage or marine epoxy for deeper stress cracks. Apply with a putty knife, following the manufacturer’s curing instructions.
- Sand Smooth: Once cured, sand the filled areas with 180-grit sandpaper, progressing to 220-grit for a smooth finish. Check fairness with a batten (a 10–12 ft strip) to ensure no dips or hollows remain.
Step 3: Mask Off Areas
Protect areas not being painted, such as rubrails, hardware, and transducers, to prevent paint bleed.
- Apply Masking: Use high-quality painter’s tape (e.g., 3M Blue) and masking paper or plastic sheeting. Ensure edges are firmly adhered to avoid seepage. For intricate areas like thru-hull fittings, cut tape precisely for a clean line.
- Double-Check: Verify all non-painted surfaces are fully covered, as overspray or drips can ruin fittings or deck areas.
Step 4: Apply Primer
A primer creates a strong bond between the fiberglass and topcoat, ensuring durability.
- Choose Primer: Select a marine-grade primer compatible with your topcoat (e.g., Awlgrip 545 Epoxy Primer for Awlgrip Top Coat). Mix according to the manufacturer’s ratio (e.g., 1:1 base to converter for Awlgrip).
- Apply: Use a foam roller for large areas and a brush for edges. Apply a thin, even coat, working in 3-foot sections to maintain a wet edge. Allow to dry per instructions (typically 12–24 hours).
- Coverage: For a 23-foot boat, 1–2 quarts of primer should suffice for one coat.
Step 5: Sand the Primer
Light sanding ensures a smooth base for the topcoat.
- Sand: Use 400-grit sandpaper with a random-orbit sander to remove imperfections and dull the primer’s gloss. Be careful not to sand through the primer.
- Clean: Wipe down with a solvent (e.g., Awlgrip Awl Prep) to remove dust and oils, including fingerprints.
Step 6: Apply the First Coat of Paint
The first topcoat sets the stage for the final finish.
- Choose Paint: For a 23-foot trailer boat, Awlgrip Top Coat or Interlux Perfection (two-part polyurethane) offers durability and gloss. Mix with reducer and converter per instructions.
- Apply (Roll-and-Tip): One person rolls on paint with a foam roller in 3-foot sections, while another follows with a 2.5” brush to smooth out roller marks. Work from the rubrail to the waterline, overlapping each section slightly to avoid lap marks.
- Conditions: Ensure temperature is 55–75°F and humidity is below 80%. Paint indoors if possible to avoid dust and dew.
Step 7: Sand Between Coats
Light sanding between coats improves adhesion and removes minor imperfections.
- Sand: Use 400-grit wet-and-dry sandpaper to lightly dull the surface. Wipe clean with a solvent-soaked rag.
- Inspect: Check for runs, sags, or brush marks. Sand these areas carefully to maintain a uniform surface.
Step 8: Apply Additional Coats
Multiple thin coats yield a better finish than one thick coat.
- Apply: Apply 2–3 additional coats of topcoat, sanding lightly with 400-grit between each. Allow each coat to dry overnight (or per manufacturer’s instructions).
- Coverage: A 23-foot boat typically requires 1–2 gallons of topcoat for 2–3 coats, depending on color and application method.
Step 9: Remove Masking
Removing tape at the right time prevents damage to the fresh paint.
- Remove: Peel off masking tape and paper while the final coat is still slightly tacky (typically within 1–2 hours of application). Pull tape at a 45-degree angle to avoid lifting paint.
- Inspect: Check for any paint bleed and touch up with a small brush if needed.
Step 10: Wax the Boat
Waxing protects the new finish and enhances its shine.
- Apply Wax: Once the paint is fully cured (1–3 weeks, depending on the paint), apply a marine wax (e.g., Life Wax) with a clean cloth or buffer. Follow with a polishing compound (1000- and 2000-grit) for a mirror-like finish.
- Maintenance: Reapply wax every 6–12 months to maintain UV protection and gloss.
Painting the Bottom of a Fiberglass Boat
For boats stored in water, antifouling paint is essential below the waterline. Here’s how to approach it:
- Assess Existing Paint: If old bottom paint is flaking, remove it with a scraper or chemical stripper. Power wash to remove loose paint and marine growth.
- Sand: Sand with 80–120-grit sandpaper to create a rough surface. Use a respirator and protective gear to avoid inhaling fiberglass dust.
- Mask: Tape off the waterline and any hardware (e.g., transducers, props).
- Apply Antifouling Paint: Choose a hard or ablative paint based on boat usage (hard for high-speed boats, ablative for slower vessels). Apply 2–3 coats with a roller, following manufacturer instructions. For a 23-foot boat, expect to use 1–1.5 gallons.
Tip: Consult local marinas to select an antifouling paint effective against local marine growth. Biocides like cuprous oxide may be restricted in some areas.
Painting the Deck and Interior
- Deck: Use a nonskid paint (e.g., Interlux Interdeck) to ensure safety. Mask off all non-painted surfaces meticulously, as deck paint is highly visible. Apply with a roller and brush, following the same prep and application steps as the hull. Avoid painting molded-in nonskid surfaces, as they’re difficult to refinish without losing texture.
- Interior: For gel-coated cabin interiors, use one-part polyurethane or enamel for simplicity. Prep and apply as you would the hull, but sanding can be lighter (220–320-grit) since UV exposure is minimal.
Safety Precautions
Painting a fiberglass boat involves hazardous materials, so prioritize safety:
- Respiratory Protection: Wear a full-face respirator with isocyanate filters when spraying two-part paints. For brushing or rolling, a sanding mask with two straps is sufficient.
- Protective Gear: Use a Tyvek suit, nitrile gloves, safety glasses, and booties to avoid skin contact with paint and solvents.
- Ventilation: Work in a well-ventilated area, preferably indoors, to minimize inhalation of fumes and dust.
- Sanding Safety: Attach a shop vacuum to your sander to control fiberglass dust, which can irritate skin and lungs.
Common Mistakes to Avoid
- Inadequate De-waxing: Failing to remove all wax can cause fisheye or peeling. De-wax multiple times and test with a clean rag.
- Over-Sanding: Sanding through the gelcoat or primer requires additional repairs. Use light pressure and check progress frequently.
- Poor Conditions: Painting in high humidity or incorrect temperatures can cause runs, sags, or poor curing. Always check the weather and manufacturer’s guidelines.
- Skipping Sanding Between Coats: This leads to poor adhesion and visible imperfections.
- Incorrect Paint Mixing: Follow mix ratios exactly for two-part paints to ensure proper curing.
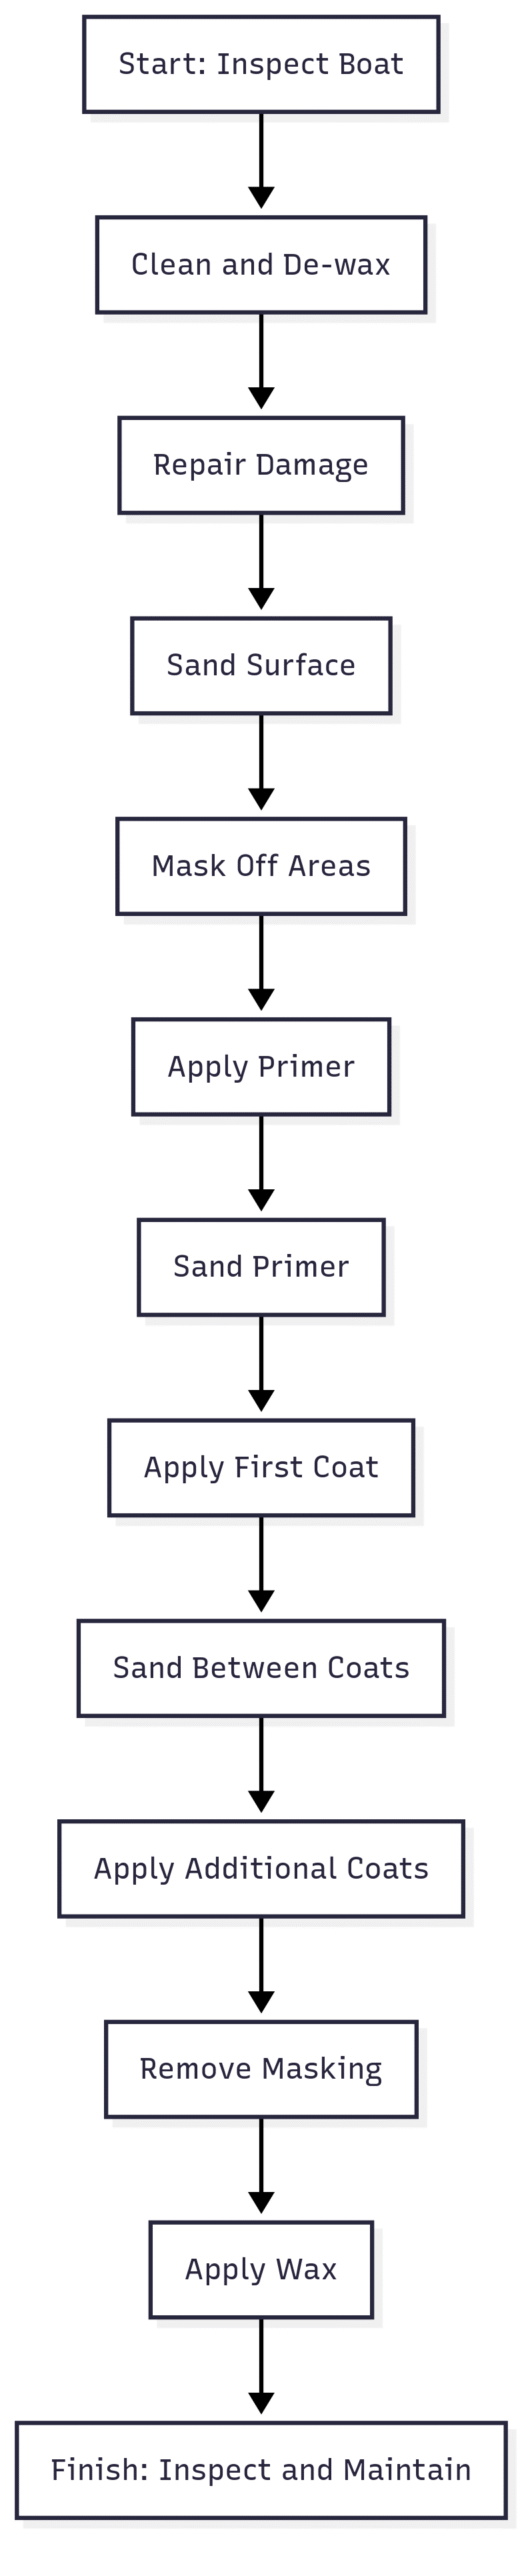
Chart: Painting Process Flow
Below is a visual representation of the painting process for a fiberglass boat, created using syntax.
Tips for a Professional Finish
- Work in Pairs for Roll-and-Tip: One person rolls, another tips for a smoother finish, especially on a 23-foot boat.
- Keep a Wet Edge: Work in small sections to avoid lap marks. Overlap each section by a few inches.
- Check Fairness: Use a batten to ensure the hull is smooth and free of dips before painting.
- Paint Indoors: If possible, move the boat to a covered area to avoid dust, dew, or rain.
- Follow Cure Times: Allow full curing (up to 3 weeks for some paints) before heavy use or waxing.
- Maintain Regularly: Wax every 6–12 months and touch up scratches promptly to extend the paint’s life.
Cost Breakdown for a 23-Foot Trailer Boat
Here’s a detailed cost estimate for painting a 23-foot fiberglass boat, assuming DIY application:
| Item | Quantity | Cost |
|---|---|---|
| Awlgrip Top Coat (Gallon) | 1 | $171.79 |
| Awlgrip Reducer (Gallon) | 1 | $61.14 |
| Awlgrip Converter (Half Gallon) | 1 | $171.15 |
| Awlgrip 545 Primer (Gallon) | 1 | $110.05 |
| Awlgrip Primer Converter (Gallon) | 1 | $103.60 |
| Awl Prep Cleaner (Gallon) | 1 | $35.70 |
| Sandpaper (320, 400, 800 Grit) | 3 sleeves | $70.00 |
| Painter’s Tape (1.88”) | 2 rolls | $17.36 |
| Plastic Sheeting (20×200 ft) | 1 | $51.54 |
| Nitrile Gloves (Box) | 1 | $8.86 |
| Rags (5# Box) | 1 | $10.55 |
| Roller Frame and Naps | 2 sets | $12.36 |
| Paint Brush (2.5”) | 1 | $8.00 |
| Roller Tray and Liner | 1 | $3.77 |
| Mixing Buckets | 2 | $3.16 |
| Buffing Compound (1000, 2000 Grit) | 2 gallons | $104.56 |
| Marine Wax (Quart) | 1 | $20.00 |
| Total | $969.64 |
Note: Costs may vary based on location, brand, and supplier. Additional tools like a sander or respirator may add $50–$150 if not already owned.
Alternative: Professional Painting
If DIY painting seems daunting, consider hiring a professional. Body shops or marine painters can achieve a flawless finish, especially with sprayed acrylic urethane. Costs for professional painting range from $2,000 to $5,000 for a 23-foot boat, depending on labor rates and paint choice. Get quotes from local shops to compare against DIY savings.
Community Insights
Boat owners on forums like The Hull Truth emphasize the importance of preparation. Users like “sinjun” and “Thom” stress de-waxing multiple times to avoid fisheye, while “warthog5” recommends specific solvents like PPG 330. Many suggest the roll-and-tip method for DIYers, as it can rival sprayed finishes with practice. For a 23-foot trailer boat, the consensus is that thorough prep and quality materials (e.g., Awlgrip or Interlux) yield the best results.
Conclusion
Painting a fiberglass boat is a rewarding project that can breathe new life into your vessel. By following these 10 steps—cleaning, repairing, priming, painting, and waxing—you can achieve a professional-quality finish on a 23-foot trailer boat. The key is meticulous preparation, high-quality materials, and adherence to manufacturer instructions. With a budget of around $1,000 and a few weekends of work, your boat can look showroom-ready, protected for years of enjoyment on the water.
Share Painting a Fiberglass Boat – A Simple Guide with your friends and Leave a comment below with your thoughts.
Read How to Optimize Boat Interior for Comfort & Functionality? until we meet in the next article.


